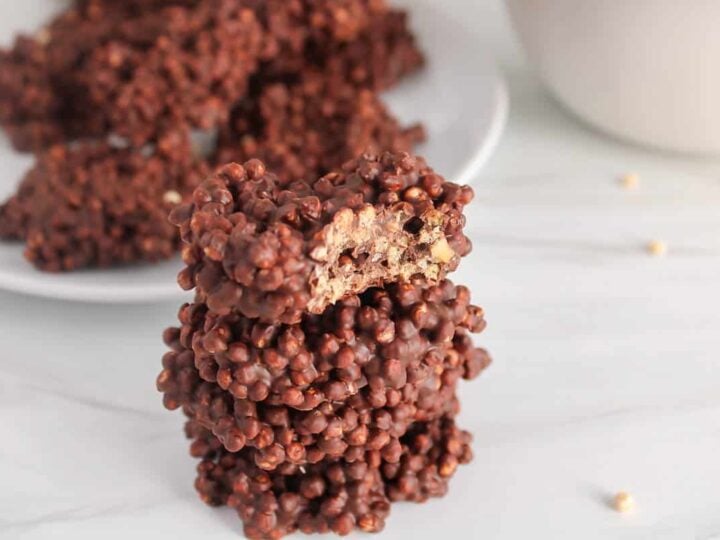
Got a peanut butter craving? These easy-to-make raw peanut butter rice krispie treats are THE BEST healthy snack to make when in need of a quick and satisfying sweet bite. Gooey yet crispy, filling and nourishing, they come together within minutes and can also be frozen for a last minute healthy dessert.
My husband Chris and I had a lot more of these mini chocolate peanut butter rice puff treats than I would like to admit.
Not only did I have to test them many times to make sure they were at their very best, but also, it's just not the kind of treat you can stop after one.
I also had to hide these treats away from our kids so they don't completely destroy our house from an overload of hyperactivity from the dark chocolate (I assure you this is no exaggeration). So, to our grand despair, Chris and I were left to eat most of them. Testing for the blog usually means filling my freezer instead of having too much of the same food to eat all at once. But again, can't-stop-after-one problem over here.
I had them at 5 am with my morning cup of coffee, in the afternoon during tea time, and for dessert, of course. I also made some while testing out my Mexican horchata, which was clearly a timing meant to be since they were perfect enjoyed together. They are SO healthy that they are a great snack to eat-at-any-time-and-everyday.
And what makes them so irresistible is how gooey, creamy, sweet, peanut buttery rich and very much chocolat-y they are. And, is there anything better than combining chocolate and peanut butter together? With a nice crunch? In mini cute bites? Made with nourishing ingredients? No, there is nothing better. I'm glad we are on the same page.

Vegan rice krispie treats without marshmallows
These treats are completely plant-based, of course! Classic rice krispie treats are made by melting butter with marshmallows to create a sweet binding agent for the rice puffs.
In this case, the sticky factor is brought by softened medjool dates combined with peanut butter. No butter nor marshmallows, but still lots of flavor and natural sugar from the sweet dates that makes these healthy bites very much candy-like.
More energy balls you might like
Ingredients for chocolate peanut butter rice krispie treats
- Fresh medjool large dates
- Peanut butter
- Raw cacao powder
- Maple syrup or agave nectar
- Vanilla extract
- Rice krispies (or rice puffs)
- Dark chocolate chips
A note on the rice puffs
I like to use brown rice puffs for extra nutrients (these organic nature's path rice puffs were the ones used to make them).
But, here is an important note: these are NOT the most crispy rice puffs out there and are rather on the chewy side. I still prefer to use them for our daily cereals as I am always looking for the least processed option (and I can handle a not perfect texture for extra nutrition).
So, if you really want your rice krispie treats to be extra crispy or you want them to be perfect for guests, then you can consider choosing another kind like the classic cereal. My sister tested with the Kellogg's Rice Krispies and noted that they were extra crispy. Also, look for fresh rice puffs for best texture!

How to make these no-bake peanut butter rice krispie treats
1- Prepare the dates
- Remove the pits from the dates and transfer them to a medium bowl.
- Pour boiling water over and let them soak for about 10 minutes. This will help soften the dates so they blend easier.
- Then, drain in a fine-mesh colander and gently squeeze the excess of water using the back of a spoon.
2- Make the sticky mixture
- In a food processor, combine the softened dates, peanut butter, cacao powder, maple syrup and vanilla extract.
- Process until you reach a super smooth sticky mixture. Take a break or two to scrape the walls and bottom. It should be a super sticky consistency.
- Transfer to a bowl.
3- Combine with the puffs
- To the date mixture, add the rice puffs and stir to combine. You will have to stir for a little while so all the puffs are incorporated into the sticky dough. I like to use a spatula to do this as it is a little more gentle on the puffs than a spoon. This might take a minute or two of stirring.
4- Shape
- Then, use your hands to shape the dough into small balls. I like to divide the dough in about 18-20 balls, but simply aim for a bite size shape you like. I like using a medium size ice cream scoop to grab the dough. Roll the dough in between the palm of your hand until it is roughly round and slightly wet your hand if the dough gets too sticky. Place the balls on a plate
5- Cover with chocolate
- Melt the dark chocolate chips in a small bowl for 1 minute in the microwave. Let the chocolate sit for about 1-2 min before stirring. It will look like not all the chips were melted at first, but they will completely melt as you stir.
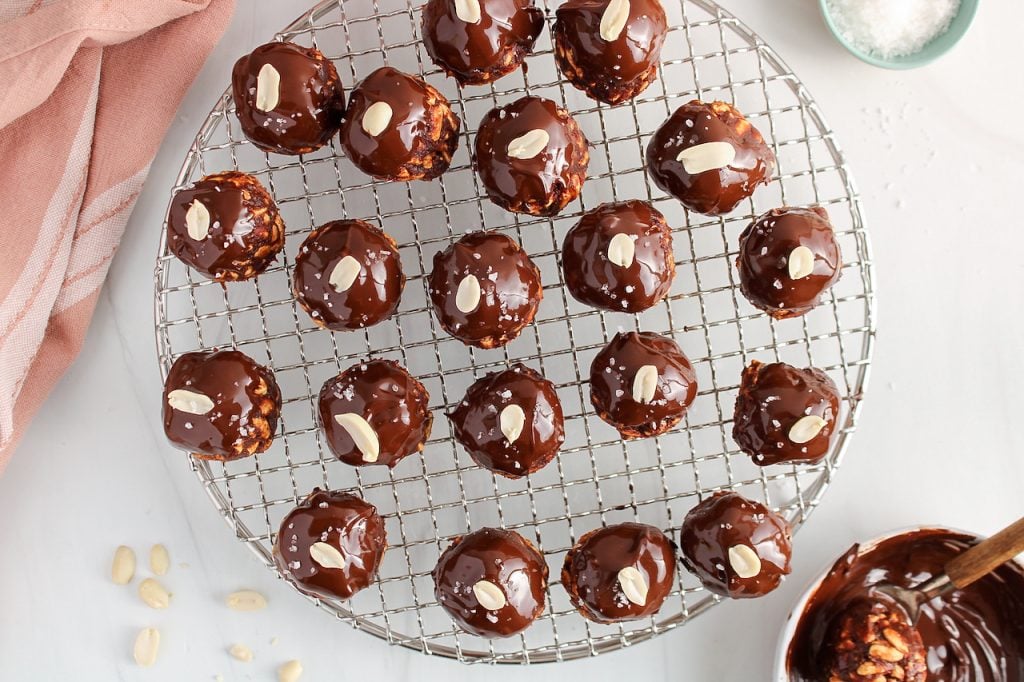
- Dip one ball at the time in the chocolate (I like to dip only the top half of the ball), then transfer on a cooling rack. Keep going until you have covered all the balls.
- At this point, you can also add a topping over the chocolate while it is still soft so it sticks to it, like sea salt and nuts. You can eat them straight, but I also like to let the treats sit in the fridge so the chocolate topping can harden a bit.


Watch how to make it

What kind of peanut butter to use when making these healthy rice krispie treats
If possible, definitively try to use a natural kind of peanut butter that does not contain any added sweetener (I promise these mini bites are still going to be super sweet!). I used Teddy's Natural Smooth Peanut Butter to make them. Make sure you stir the peanut butter very well first to a runny texture for best result (avoid the grainy peanut butter you get at the end of the container!).
I think these would also be amazing if you have a chunky kind of peanut butter as it would add some extra crunchy texture.
Are these gluten-free?
Yes! Just make sure to use gluten-free rice puffs (the classic Kellogg's Rice Krispies are NOT labeled gluten-free).

Tips when making these peanut butter rice krispie treats
- This recipe started as bars, then became squares and ended up in balls (I told you we ate a lot of them!). So, feel free to shape the sticky puff rice dough the way you want. If you want to make squares that look more like a classic rice krispie treat, then mold the mixture into a 8 x 8 inch square dish that was first covered with parchment paper, then drizzle with the melted chocolate over. I would recommend to chill for a bit before cutting.
- Choose medjool large dates as they are sweeter, taste better and will be creamier in texture after being processed.
- Look for a low in sugar dark chocolate for topping as the rice puff treat are already super sweet.
- After you dipped the balls in the melted chocolate, place them on a surface that will help keep them standing up until the chocolate topping has harden. I love using a wire mesh cooling rack for this.
- If you want your treats to be crispier, then feel free to add more rice puffs. You can simply eye-ball it and add more as long as it combines well.
Storage
Keep them in an air-tight container in the fridge for up to 5 days. Transfer the whole cooling rack in the fridge first so the melted chocolate topping can set, then you can pile the bites in a container without messing with the chocolate.
They can also be frozen for up to 3 months.

Other chocolate recipes you might like
- Black bean brownies
- Chocolate oatmeal cookies
- Chocolate avocado pudding
- Mini matcha brownies
- Chocolate milkshake
- Vegan millionaire shortbread
- Beet chocolate muffins
- Strawberry chocolate bars
- Cashew chocolate milk
- Matcha chocolate oatmeal
- Vegan blondies
- Chocolate covered dates with peanut butter
I hope you enjoy these chocolate peanut butter rice krispie treats as much as we do! If you try them, please leave a comment below and rate the recipe to let me know how they were. Your feedback is so helpful!
Let's stay in touch with Instagram, Pinterest and Facebook. Also, don't forget to subscribe to my newsletter to be sure not to miss anything.
📖 Recipe

Peanut Butter Rice Krispie Treats with chocolate
Equipment
- Food processor
Ingredients
- 1 packed cup medjool dates (about 15 large) - pitted, soaked in boiling water for 15 minutes, then drained
- ½ cup peanut butter
- ¼ cup raw cacao powder
- ¼ cup agave nectar or maple syrup
- 1 tsp vanilla extract
- 2 ½ cups puffed rice - I used brown puffed rice
- ¾ cup dark chocolate chips - melted 1 min in the microwave, then let sit for 2 min, then stir
Instructions
- Start by soaking the dates in boiling water for about 10-15 minutes. Then, drain them using a fine mesh colander and gently press on them using a spoon to remove the excess of water.
- To a food processor, add the softened dates, peanut butter, cacao powder, maple syrup and vanilla extract. Process until the mixture becomes very smooth and uniform, taking a break or two to scrape the walls and bottom of the food processor. Transfer the sticky mixture to a large bowl.
- Add the rice puffs to the sticky mixture and stir until combined. It might take a few minutes as the consistency is very sticky and thick.
- Then, shape the dough into about 15-20 balls by rolling it in between the palms of your hands.
- Place the chocolate chips in a small bowl and melt in the microwave for 60-90 seconds. Let the chips rest for about one more minute in the microwave, then stir to help them melt completely.
- One ball at the time, dip their top half in the melted chocolate and transfer on a surface that will allow them to stand up, like a cooling rack (so the chocolate can set). You can eat them right away, or place them in the fridge until the chocolate hardened for a bit. Enjoy!
Video
Notes
- Store the treats in the fridge for up to 5-7 days. Can also be frozen for up to 3 months.
- I love using brown rice puffs to make them (although classic white rice puffs, especially from the brand Kellogg's, will give you a crispier result)
- You can also shape the dough into squares by using a 8 x 8-inch container. Let them set in the fridge before cutting them.
- Nutrition: please note that the nutritional information is an estimate per serving provided for informational purposes only (calculated by software) and accuracy is not guaranteed. Consult with your healthcare provider or a registered dietitian if you need precise nutrition calculations for health reasons.
NUTRITION
Pin it for later!


Delicious, these were great!