This vegan millionaire shortbread is easy to make and so amazingly delicious. A perfect trio of a shortbread cookie base with a decadent caramel layer that's also topped with dark chocolate. Can it get any better than that? Great for any holiday and also freezes well.

I'm SO glad you found your way over here. You might be looking for something new to try or something festive to make for an upcoming holiday. So here it is, this vegan millionaire shortbread is THE recipe you need.
And I know this is quite the fancy-looking dessert with such a grandiose name, so you might think that it must be complicated to live up to its flashy pretentious title. BUT, you have to hear me out. It is SO easy to make.
This recipe requires only 8 simple ingredients, is completely fail-proof (no tricky caramel to make), healthy-ish and made easy with the littlest hands-on prep time. This is a decadent 3-layer dessert that no one can resist.
This dessert is perfect for Mother's Day, Christmas, Easter, Thanksgiving, birthday parties, or any fun celebration. It also freezes well, so you can make it any day without any special occasion and freeze the extra for later.
Hope you give it a try! ❤️

What's a millionaire shortbread
A millionaire shortbread is a very rich (explaining its name) Scottish dessert that layers a shortbread cookie base that's topped with a gooey caramel filling and then a chocolate coating (yes, all the best things in the world combined!).
This dessert carries a few different names, like caramel slice, caramel square or even caramel shortcake. There are a few variations to the classic recipe with some including coconut, apple or even nuts like macadamia.
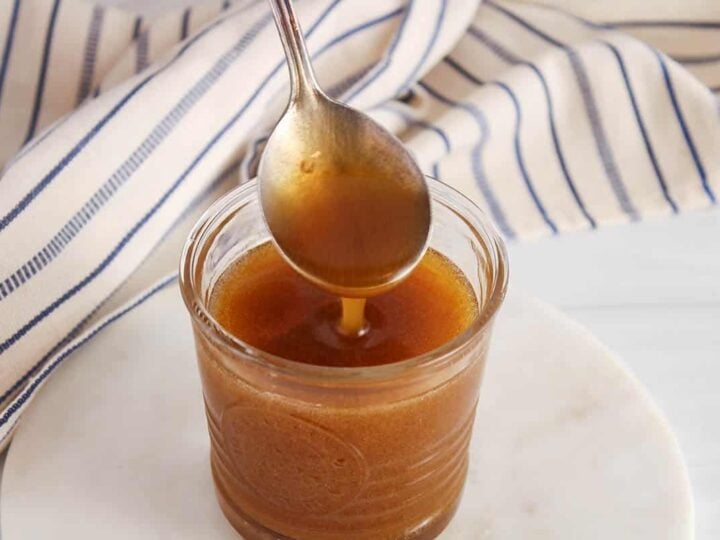
Most caramel shortbread recipes though include condensed milk and lots of white sugar, especially to make the caramel middle layer. This vegan version has a healthier twist and skip the condensed milk and sugar to use maple syrup + coconut milk instead. The syrup helps reach the caramel texture but also adds such an amazing flavor to the dessert.

Ingredients for vegan millionaire shortbread
You will only need pantry ingredients to make it, so you will always be ready to whip up a millionaire at any time 🙂
- Almond flour
- Flour
- Baking powder
- Coconut oil
- Maple syrup
- Canned coconut milk
- Corn starch
- Dark chocolate chips
How to make this vegan millionaire shortbread
(Scroll all the way down to the recipe card to get all the details)
There are 3 easy steps to make this dessert with minimal hands-on time. BUT, you will need to be patient as the dessert needs to set in the fridge before cutting and eating. I recommend you make it the day before you need it.
Step 1: Make the shortbread layer
- Preheat the oven to 375º.
- In a large mixing bowl, simply combine the flours (almond flour + all-purpose flour), coconut oil, and baking powder with the maple syrup in a large bowl. Crush the coconut oil using a spoon to incorporate it with the flour. I find that using a wide shallow bowl gives me more space to work with a spoon.
- When mostly combined (tiny lumps of coconut oil are fine!), transfer the shortbread dough to a square baking dish (8 x 8 in) that's covered with parchment paper.
- Then, press on the mixture using your hand (or the back of a glass) to create an even layer. The shortbread is kind of the backbone of the dessert, so you want to press enough so the squares hold well.
- Bake in the oven until golden brown (for 15 min). Take out of the oven and set aside until ready to pour the caramel over.


Step 2: Make the vegan caramel filling
- Start by whisking the cornstarch with the water in a small bowl. Set aside.
- Then, whisk the canned coconut milk to a uniform mixture (I do it straight in the can, but you can transfer it in a bowl to whisk too). You will need 1 cup only as opposed to the whole can, so you need to stir it first (the coconut water often divides from the cream part).
- Then, warm up the maple syrup alone in a medium pot. Once it reaches a gentle boil, then keep simmering uncovered (at medium-low heat) for 6 minutes (put a timer on!). Stir/whisk often as the syrup tends to stick to the sides and watch carefully so it does not overflow. The syrup will thicken slightly during that time.
- In the last minute of simmering the maple syrup, warm up the 1 cup of coconut milk for one minute in the microwave (you don't want to add cold milk to the hot syrup). When the 6 minutes is done, add the warmed up coconut milk, stir well and bring back to a gentle boil. Once it starts simmering again, then add the cornstarch mixture very gently on a small stream while whisking vigorously. Keep whisking for maybe 30-60 sec, then remove from the heat. The caramel should have thickened up nicely.
- Pour the caramel sauce right away over the shortbread in the baking dish (easier to pour when done right away as the caramel will thicken while cooling down). Let the dish rest at room temperature for a few minutes so the caramel can set further.


Step 3: Make the chocolate layer
- Check to make sure that the caramel layer had enough time to set: just touch with your finger, it should not be liquid-y anymore and be able to hold on to the chocolate layer.
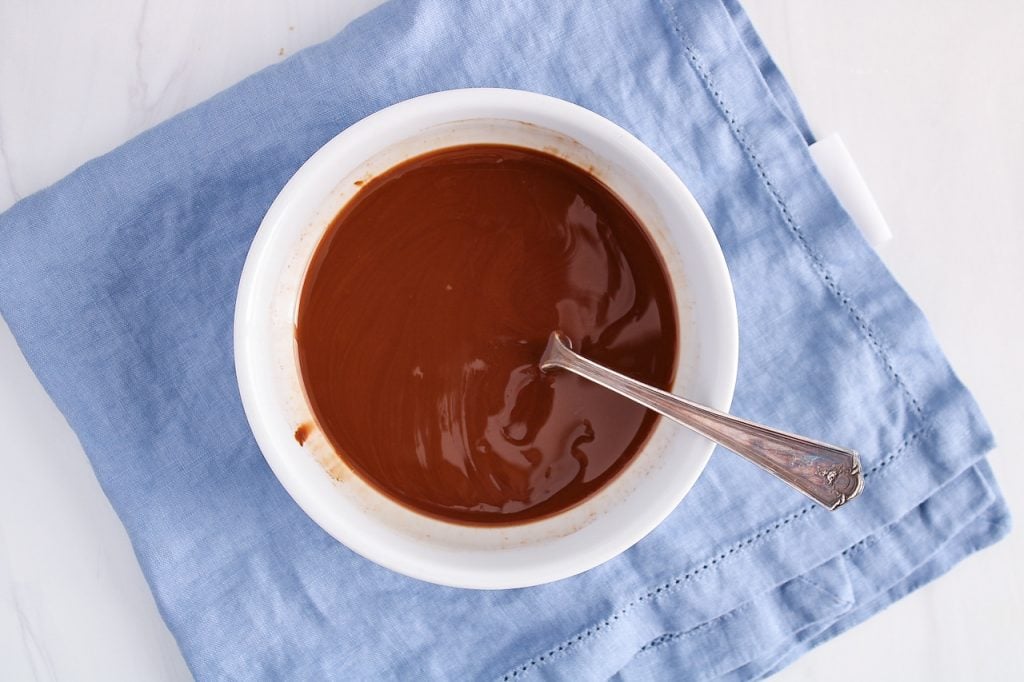
- Then, simply warm up in the microwave the chocolate chips with the coconut oil in a small bowl for about 1-2 minutes (or until the chips are starting to melt and the oil is all liquid - do not overheat). Then, stir until it becomes uniform.
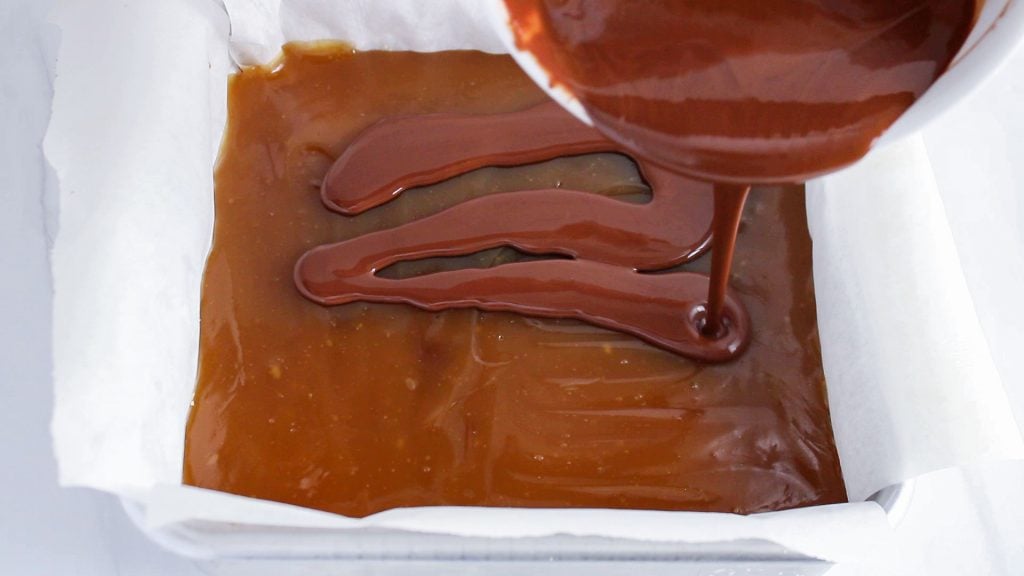
- Drizzle the chocolate sauce over the caramel. Then, hold the dish and tilt it while making little circles to help the chocolate spread evenly all over the caramel surface (the chocolate layer is thin and it does not work well to spread it with a spoon or spatula).

Step 4: Let the dessert set
- Transfer the whole dish into the fridge and let it set for at least 4 hours, I usually do it overnight. During that time, the caramel and chocolate layers will firm up.
- When ready to cut in squares or bars, then I recommend you take the dessert out of the fridge for about 1 hr before to allow the chocolate to soften a bit. It is harder to cut in nice even squares if the chocolate is hard and breaks as you try to cut.


Watch how to make it

How to cut your vegan caramel slice
You can cut the cake the way you want, but I find that cutting it in squares works the best. After all, it is a shortbread base, which can be a little crumbly. So, it helps not cutting the pieces too big so they hold better. You can make vegan millionaire shortbread bars too by slicing it in small rectangular.
Also, I advise cutting the whole dish all at once, so you can just grab-and-go.
Here are a few tips on how to cut it that you might find helpful:
- I mentioned this before, but I found the dessert much easier to cut when the chocolate wasn't super hard. SO, I recommend taking the dessert out of the fridge for maybe for an hour before cutting to allow the chocolate to soften for a bit first.
- If you want to create perfect-looking squares, then you might want to remove a thin slice all around the dish. This will set beautiful sharp edges.
- Using a long sharp knife will allow you to cut a whole row all at once and get even-looking squares.
- To help not break the chocolate while cutting the squares, you can run your knife under super warm water for a few seconds, then dry it with a towel and then, cut right away while the knife is still hot. It melts the chocolate just a teeny tiny bit while cutting, which helps have sharper cuts.

Tips when making a vegan millionaire shortbread
- Use coconut oil that's in a harder state (usually at room temperature) when making the shortbread. If you live somewhere where it is really hot, then you might want to let your oil harden a bit in the fridge before using it. You do not need it to be super hard, but you want to avoid a liquid state for the best shortbread texture.
- I preferred this dessert when using a refined coconut oil as I found that the unrefined kind had a coconut flavor that was too overpowering.
- When making the shortbread base, try to make an even layer by pressing tightly with your hand, including the edges and corners. Try not to have too much of the mixture that's rising on the sides too.
- Use a large enough pot (I used a medium size as opposed to a small one) when making the caramel. It tends to try to overflow with lots of bubbles when reducing the maple syrup, so you want a pot large enough to handle that. Also, stay around when making the caramel, I usually have to play around with the heat for a few times to adjust if it's bubbling too much or not enough, you want a nice gentle simmer for a whole 6 minutes (and an overflow of maple syrup sounds like a mini disaster in your kitchen).

Variations to the recipe
This is not the kind of recipe you can easily play around with the ingredients as every one of them and every measurement have a reason to be to create the BEST vegan shortbread millionaire. But, you can customize the chocolate top layer if you want.
You can sprinkle some shredded coconut, sea salt, a swirl of white chocolate (use a toothpick to swirl around), chopped nuts (try chopped peanuts in between the caramel and chocolate layer, yum!), etc.
If you choose to add a topping, then do so while the chocolate is still soft so it sticks to it and choose something that won't interfere with the cutting phase as the dessert can be a little delicate to cut (use something that's small-ish or soft and easy to slice).
Also, if you love the sweet and salty combo, then you can add some sea salt to your caramel (add it after it is done though).
Vegan millionaire shortbread serving suggestions
As you can imagine, this dessert is super sweet even though it is made healthier. I like to serve it with something warm and not sweet at all to balance out, like a cup of warm tea (perfect for vegan afternoon tea!).
Serve in squares, mini squares (bite size) or bars too. I like to serve in a plate with a fork as it can be a little crumbly.
A great final touch is to also sprinkle some salt (larger flakes if you have them) over the squares to balance out the sweet flavor.
One more thing, I recommended cutting the dessert when the chocolate is not super hard for a better sharp cut. Once cut though, feel free to eat straight from the fridge. The harder top chocolate layer will press a little on the softer caramel squeezing some out just a little, but the crunchy chocolate opposed to softer is actually even better for my taste.

Vegan caramel slice storage
Once the millionaire is cut, then store the squares in the fridge in an airtight container for up to 5 days. Eat cold straight from the fridge.
You can also freeze the squares for up to 3 months.
Freezing tips
Make sure to cut the whole dish before freezing so you can just grab-and-go.
Also, keep them apart from each other so they don't stick together. If piling them in a container, then make sure to layer some parchment paper in between the squares so they are easy to separate.

FAQs
Yes, you can easily make it gluten-free by swapping the all-purpose flour for a 1:1 certified GF flour. We like the GF flour from the brand Bob's Red Mill.
Yes, you can use a food processor to make the shortbread layer. Simply process everything except for the coconut oil first. Then, scatter the solid coconut oil all over the mixture in the food processor and pulse until mostly combined. Try not to process too much or it can warm up the mixture and melt the coconut oil.
More vegan dessert recipes to try
- Vegan cookie cake
- Chocolate oatmeal no bake bars
- Vegan shortbread lemon cookies
- No bake peanut butter fudge
- Vegan date scones
- 3-Ingredient peanut butter cookies
- Almond flour thumbprint cookies
I hope you enjoy this vegan millionaire shortbread as much as we do! If you try it, please leave a comment below and rate the recipe to let me know how it was. Your feedback is so helpful!
Let's stay in touch with Instagram, Pinterest and Facebook. Also, don't forget to subscribe to my newsletter to be sure not to miss anything.
📖 Recipe

Vegan Millionaire Shortbread (without condensed milk)
Ingredients
For the shortbread crust
- 1 cup flour - all purpose or white whole wheat
- 1 cup almond flour - blanched is better
- 1 tsp baking powder
- ½ cup refined coconut oil - firm, chill first if needed
- 1 tbsp maple syrup
For the caramel
- 1 cup maple syrup
- 1 cup full fat coconut milk - from a can, mixed to uniform texture before measuring the cup
- ¼ cup cornstarch + ¼ cup water
Chocolate top layer
- ¾ cup vegan dark chocolate chips
- 2 tbsp coconut oil
Instructions
Make the shortbread crust
- Pre-heat the oven to 375º. Line a 8 x 8 square baking dish with parchment paper.
- In a large bowl, combine the flour, almond flour, and baking powder. Then, add the coconut oil and maple syrup and combine by mixing with a spoon or your hand. You will have to crush to coconut oil in the flours to reach a uniform mixture (tiny clumps of coconut oil are fine).
- Transfer the mixture to the prepared baking dish and press using your hands to make an even layer. You want to press enough so it is tight which will help the squares hold better.
- Bake for 15 minutes (or until it starts to turn golden brown). When done, take out of the oven and let it rest until ready to pour the caramel over.
Make the caramel
- Combine the cornstarch with the water in a small bowl until there are no clumps anymore. Set aside.
- In a medium-large pot, add the maple syrup and bring to a gentle boil. Then, keep simmering on medium-high heat for 6 minutes whisking occasionally (put a timer!). Watch carefully as it can overflow easily.
- During the last minute of simmering the syrup, warm the coconut milk for 1 minute in the microwave. When the syrup is done simmering, slowly pour the coconut milk into the reduced syrup as you are whisking.
- Keep warming up the syrup-coconut mixture until it starts boiling again. Then, still on the heat, slowly add the cornstarch mixture in a thin stream as you are vigorously whisking. Keep whisking and warming for about 30-60 seconds or until the mixture is thick, then remove from the heat and pour over the crust.
- Set the dish aside so the caramel can start to firm up. You can also transfer in the fridge for a little if that helps speed up the cooling process. You can touch the caramel to verify when it is firmer and ready to add the chocolate layer (I waited for about 15-20 minutes at room temperature).
Make the chocolate layer
- In a medium bowl, add the chocolate chip and coconut oil. Warm up for about 1-2 minutes in the microwave, then stir in the bowl to help the chocolate chips melt. Stir until the chocolate is super smooth, then drizzle over the caramel. Then, tilt the dish in little circles to help spread the chocolate evenly.
- Cover and chill in the fridge for at least 4 hours, I usually do overnight.
To serve
- The chocolate layer tends to firm up nicely after resting in the fridge, so you will want to get the whole dish out at least 1 hour before cutting. Use a knife to detach the shortbread in the corners, then pull on the parchment papers to get the whole dessert out. Then, cut in smaller squares or bars. Serve either at room temperature or cold straight from the fridge.
Video
Notes
- Use coconut oil that's in a harder state (usually at room temperature) when making the shortbread (chill in the fridge if necessary).
- I preferred this dessert when using a refined coconut oil as I found that the unrefined kind had a coconut flavor that was too overpowering.
- When making the shortbread base, try to make an even layer without any of the mixture that's rising on the sides.
- Use a large enough pot (I used a medium size opposed to a small one) when making the caramel. It tends to try to overflow with lots of bubbles when reducing the maple syrup, so you want a pot large enough to handle that. Also, stay around when making the caramel, I usually have to play around with the heat for a few times to adjust if it's bubbling too much vs not enough, you want a nice gentle simmer for a whole 6 minutes.
- To cut the dessert, then as recommended, let the dessert out of the fridge for about an hour so the chocolate soften slightly. Then, warm up the knife in super hot running water, then dry with a towel. Slice when the knife is still warm (helps the chocolate not crack).
- To store: keep the squares or bars in an air-tight container in the fridge for up to 5 days. I like this dessert cold straight from the fridge, although the chocolate is harder and tends to press gently on the caramel. You can also freeze the square for up to 3 months (separate the pieces with parchment paper).
- Nutrition: please note that the nutritional information is an estimate per serving provided for informational purposes only (calculated by software) and accuracy is not guaranteed. Consult with your healthcare provider or a registered dietitian if you need precise nutrition calculations for health reasons.
NUTRITION
Pin it for later!


I just made them, they are so good! I'll def make them again
Thank you for this amazing recipe !