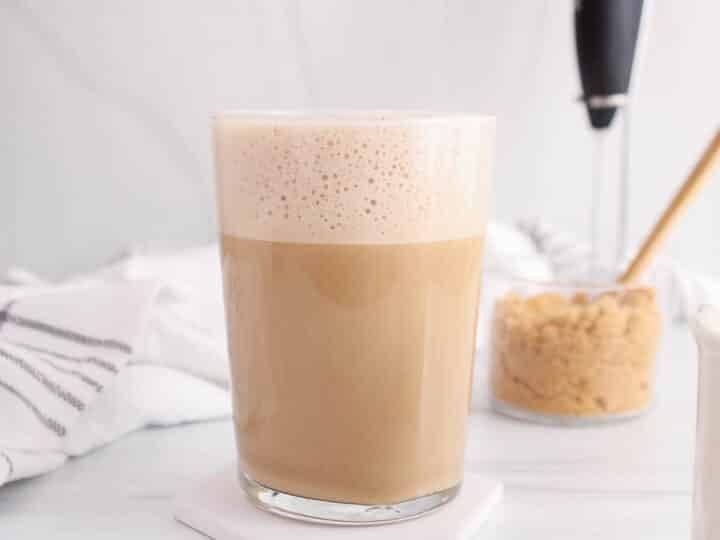
This refreshing coconut milkshake is so easy to make and the perfect dairy-free treat to cool off on a hot summer day. It's only made with a few ingredients (no ice cream needed), has a rich coconut flavor and makes for such a fun snack that kids adore!

It's summer, yay! Although, it really doesn't feel like it right now. It's been pouring rain all day and I haven't stepped outside of the house, AT ALL. Guys, the mom-at-home-struggle-is-real, no judgment please.
I actually suggested my 3 and 4.5 y/o to go dance outside in the rain just so we don't all go crazy. But, obviously, my proposal was completely ignored. So, we are in fact going a little nuts at this exact moment.
The only thing that's left for me is, of course, to make myself a large milkshake. But not any kind of milkshake: an extra creamy, coconut-y, tropical-ish kind of shake. The sort of refreshing drink that can make you feel like there is a bit of sun, somewhere, anywhere.
And this coconut milkshake does not disappoint! I normally make my banana chocolate milkshake, which is super healthy and satisfying (healthy enough to enjoy for breakfast). But, this time, I needed the extra rich coconut milkshake drink. The full-fat-can-of-coconut-milk drink, thankyouverymuch.
But hey, it's not THAT bad. The coconut milk is rich in fat and calories, sure, but guys, there is no ice cream in there! So, you see? Not bad at all!

Why you'll love this coconut milkshake
- Only 4 ingredients needed that are mostly from your pantry (+ frozen bananas)
- So creamy and rich! Whoa!
- Without any ice cream
- No refined sugar added
- Dairy-free, fully plant-based and easy to make
- Simply the best treat to enjoy on a hot day!
Ingredients you'll need
- Coconut milk
- Frozen bananas
- Shredded coconut (unsweetened)
- Vanilla extract
- Optional: sweetener (it will depend on how ripe the bananas are)

What kind of coconut milk to use?
The coconut milk is essential for coconut flavor, but also a key ingredients to get that nice creamy and rich texture typical of a milkshake. There are pretty much 3 options here depending of what you are looking for (and how bad you need to treat yourself).
1- Full fat canned coconut milk: this is my preferred kind of coconut milk when making this milkshake. It really gives the drink a great creamy and thick texture and helps create a shake that has a consistency that's close to the one of a regular ice cream milkshake.
2- Low fat canned of coconut milk: this is a great option too. You will see in the can that the texture is more "watery" with pretty much no top cream portion. This will give you a milkshake that's a little less rich and maybe thiner, but also slightly lower in added fat content (and healthier).
3- Boxed coconut milk: this is the kind of coconut milk you buy in the plant-based milks section at the grocery, use in your cereals and keep in your fridge. It has a very "milky" consistency with the lowest in fat option. This coconut milk will bring a fun coconut taste to the milkshake, but might not add enough thickness to it. If using it, then you might want to add more frozen bananas or a few ice cubes to compensate.
Why use frozen bananas in vegan milkshakes
Frozen bananas are AMAZING in texture and flavor. When blended, they feel like ice cream (yes, really!) as they become super creamy with a rich feeling in the mouth. I also feel like the strong banana flavor is mostly lost when eating them frozen, which makes them a great ice cream substitute.
In this recipe, combining the frozen bananas with rich and creamy coconut milk is what makes the drink very milkshake-ish.
Also, I usually freeze my bananas when they are super ripe, which means they will be extra sweet. This help sweeten the milkshake without having to add a tons of extra sweetener.

How to make this coconut milkshake
- First, you will have to roast some shredded coconut in a pan to enhance the flavor. Add the shredded coconut to a non stick pan and don't add any oil. Warm on medium-high heat, stirring or shaking the pan often to make sure it roasts evenly. Once the coconut turns golden brown and there is a nice fragrant smell (about 5 minutes), remove from the heat and let it completely cool down (you don't want it to warm up the milkshake!). Careful as it can burn super quickly!
- In a blender, add all the ingredients and blend until creamy. You can start without any added sweetener and taste to see if it needs any. Also, once it's blended, you can add a few ice cubes and pulse a few times to ensure your drink is super cold.


Watch how to make it

Tips when making a coconut milkshake
- Even though this milkshake is quick and easy to prepare, you will have to plan ahead and make sure you have frozen bananas. This is essential to the recipe as it creates the ice cream texture.
- If you make this milkshake when it's really hot outside, then I recommend you chill your can of coconut milk in the fridge for a few hours (a thicker cold coconut milk works better).
- Obviously, this milkshake is best when served and enjoyed right away and does not make for great leftovers. However, if you have extra milkshake you won't be able to drink immediately, then transfer the leftovers in an ice cube tray and freeze. Then, use the cubes in your smoothies or thaw in your oatmeals.
- You want to blend the ingredients enough so it gets super smooth, but not for too long either as it can warm up the mixture and make it feel a little watered down (if this happens, add a few ice cubes and pulse for a few times!).

Do I need a high speed blender to make it?
My Vitamix pretty much changed my life (no-exaggeration-here) as it turns everything so creamy and smooth without much effort! If making this milkshake with a high speed blender, then you might need to use the tamper at first to help blend the bananas.
If you have a regular blender, you can still make this smoothie! The shredded coconut might not be perfectly crushed, but it will still be delicious and even add some texture to your drink. You could even consider blend the coconut milk with the shredded coconut first to get them crushed as much as you can, then add the rest of the ingredients before blended until smooth. Also, the mixture might be too thick at first for your blender, so take some breaks to scrape the walls and stir around the blades to help blend it. You don't want to add more liquid at this point as it will water down the milkshake after its done.
Coconut milkshake recipe variations
This is a great recipe to also use as a base to turn into different kind of vegan milkshakes!
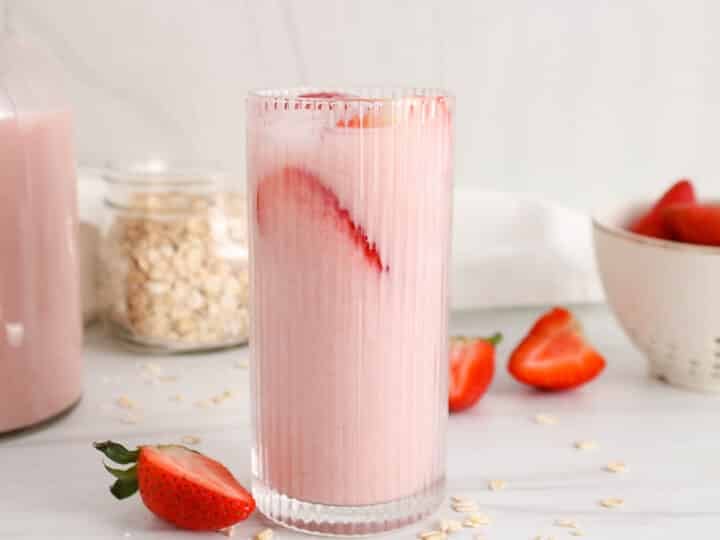
Make a strawberry coconut milkshake: swap the frozen bananas for frozen strawberries (or do half bananas-half strawberries). In this case, you might need to add extra maple syrup as the strawberries tend to be less sweet.
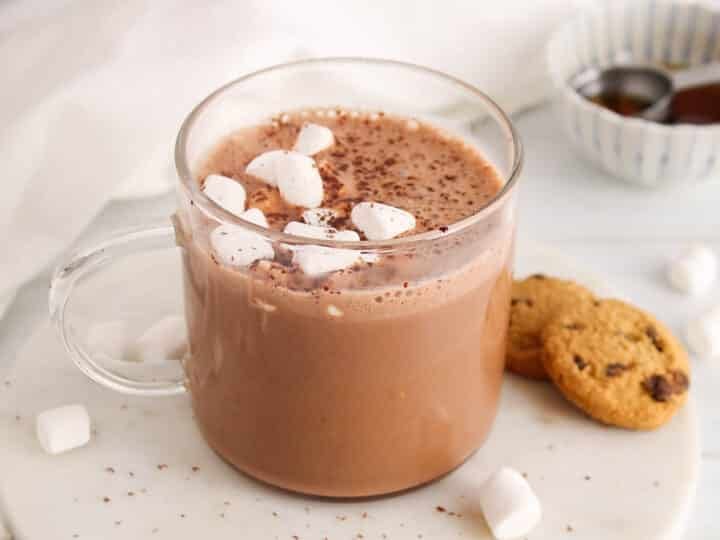
Make a chocolate coconut milkshake: simply add some raw cacao powder (try 1-2 tbsp) to the blender and top the glass with mini chocolate chips.
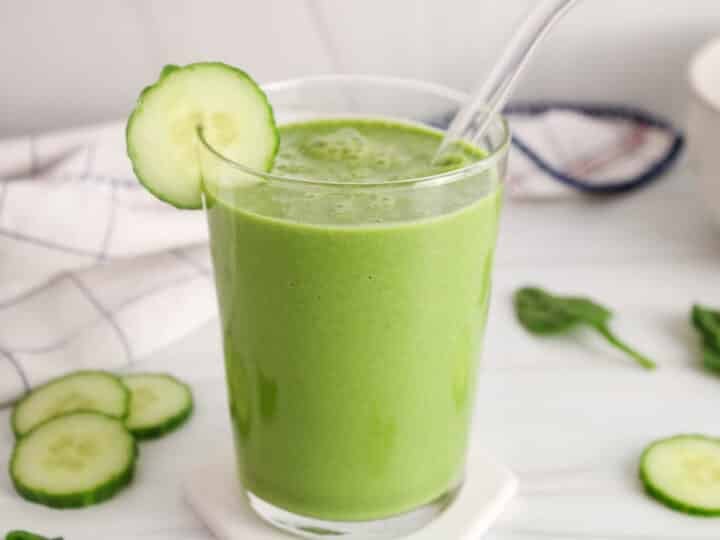
Make a tropical coconut milkshake: swap half of the bananas for frozen pineapple or frozen mangoes.
Serving suggestions
This milkshake is fun served with whipped cream, especially coconut whipped cream and vegan chocolate sauce. Try to toast more shredded coconut then needed so you can garnish your glass using it as well.

Other coconut milk recipes you might like
- One-pot curry ramen
- Coconut pineapple rice
- Coconut peach popsicles
- Butternut squash and red pepper soup
- Pineapple chia parfait
- Tikka masala
- Spiced coconut whipped cream
- Vegan millionaire shortbread
- Coconut milk pasta sauce
- Coconut milk mac and cheese
I hope you enjoy this coconut milkshake as much as we do! If you try it, please leave a comment below and rate the recipe to let me know how it was. Your feedback is so helpful!
Let's stay in touch with Instagram, Pinterest and Facebook. Also, don't forget to subscribe to my newsletter to be sure not to miss anything.
📖 Recipe

Coconut Milkshake (No Ice Cream)
Equipment
- Blender
Ingredients
- ½ cup shredded coconut - unsweetened
- 15 oz canned coconut milk - full or reduced fat
- 2 small frozen bananas
- 1 tsp vanilla extract
- 1 tbsp maple syrup - or other sweetener, optional
Instructions
- Add the shredded coconut to a non stick pan and toast on medium-high heat. Stir or shake the pan often and watch carefully so it does not burn. The coconut is ready when fragrant and golden brown (about 5 minutes). Let cool completely before using.
- Add all the ingredients to a blender (including the toasted coconut) and blend until smooth.
- Serve immediately. Makes for 1 large milkshake or 2 small ones. Enjoy!
Video
Notes
- Make sure to use frozen bananas. This is essential to the recipe as it creates the ice cream texture.
- I recommend you first chill your can of coconut milk in the fridge for a few hours (thicker cold coconut milk works better), especially in hot weather.
- If you have extra milkshake you won't be able to drink immediately, then transfer the leftovers in an ice cube tray and freeze. Then, use the cubes in your smoothies or thaw in your oatmeal.
- You want to blend the ingredients enough so it gets super smooth, but not for too long either as it can warm up the mixture and make it feel a little watered down (if this happens, add a few ice cubes and pulse for a few times!).
- You can easily flavor this milkshake using other fruits: always use fruits that are frozen and you can use a combination of bananas and other frozen fruits to keep the texture super creamy, like strawberries and mangoes. Also, try adding 1-2 tbsp of raw cacao powder to make a coconut chocolate milkshake.
- Nutrition: please note that the nutritional information is an estimate per serving provided for informational purposes only (calculated by software) and accuracy is not guaranteed. Consult with your healthcare provider or a registered dietitian if you need precise nutrition calculations for health reasons.
NUTRITION
Pin it for later!

Do you have to toast the coconut?
Hi! Yes, I do toast the coconut. It adds so much flavor!
Delicious. Refreshing. Toasting the coconut makes all the difference. Worth the extra step.
Hi Sharon, thanks so much for your comment! Glad you liked it!
So so good, what a treat.
Thanks for your comment!