This easy to make coconut whipped cream is so unique with its spiced and delicious taste, thanks to the cinnamon and nutmeg. No granulated sugar required and make this thick and fluffy whipped cream in only a few minutes!
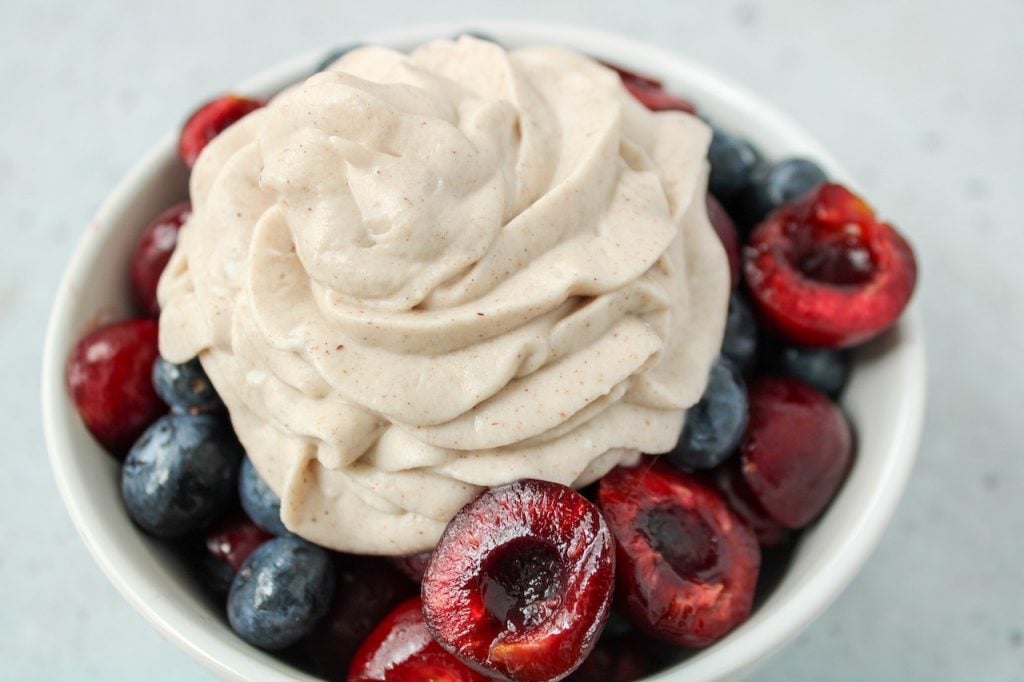
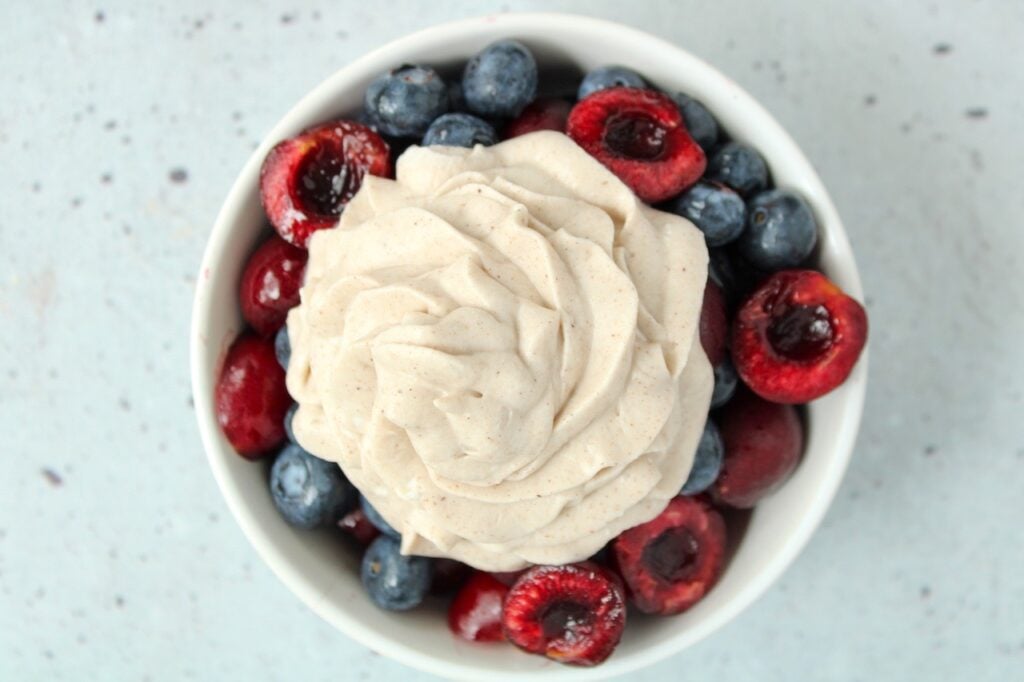
No need to reach for the dairy processed whipped cream anymore! Just keep a few cans of coconut milk in your fridge and you will be able to enjoy a luscious dessert topping whenever you want. It goes so well with the classic fruits pies or as a cupcake frosting, but my favorite way to enjoy it is simply as a fruit dip. Or make your morning oatmeal much more exciting and garnish it with this coconut whipped cream for a fun treat. Toddler and mom approved!

How to make this coconut whipped cream:
This silky cream will become fluff in a minute, but there are a few easy basics to follow to make it extra perfect.
1. Chill your cans of coconut milk overnight for best results. This will allow the coconut cream to get hard enough to make the whipped result more fluffy and stiff. Also chill the bowl you will use for the whipping process, just put it in the freezer for about 10-15 minutes before starting the recipe.

2. You will only use the top cream part of the cans, so be gentle when moving the cans around after the chilling step to keep the cream and water parts separated. Then, open the cans, gently scrape the top cream with a spoon and transfer it to the chilled bowl. You won't need the coconut water for this recipe, but keep it for your next smoothie!

3. Using an electric mixer, start by whipping the coconut cream alone for about 30-45 seconds until you reach a fluffy and silky texture.

4. Then, add the rest of the ingredients to the whipped cream and whip for another 30-60 seconds. You don't want to over whip to avoid separating the cream. The whipped cream will stay good in the fridge for a few days.


Important note:
Different brands of canned coconut milk can provide different results. Even within the same brand, it seems like different batches of canned coconut milk can vary in their content, thus giving a different result. To help you succeed for this recipe, always make sure you chill the cans and bowl. Also, keep the final whipped cream in the fridge until you are ready to eat it to keep its thick texture. One more thing, I'm all for low fat meals in general (especially processed fat), but now is not the time to reach for the low fat coconut milk! Choosing full fat content is crucial to get that nice fluffy texture.

Pairing suggestions
- 3 ingredient chocolate pudding
- Blueberry lemon cake in a mug
- Vegan banana mug cake
- Oat flour pancakes
- Vegan apple cider donuts
📖 Recipe

Vegan spiced coconut whipped cream
Equipment
- Electric mixer
Ingredients
- 2 15 oz FULL FAT and unsweetened canned coconut milk - chilled overnight
- 2 tbsp maple syrup or agave nectar
- 1 tsp vanilla extract
- 1 tsp cinnamon
- ¼ tsp ground nutmeg
Instructions
- Chill your cans of coconut milk in the fridge overnight.
- Chill a large bowl in the freezer for 10-15 minutes just before whipping the cream.
- Carefully open the cans of coconut milk making sure you don't shake them too much. Then, remove gently the top cream layer with a spoon and transfer to the chilled bowl. Use the coconut water left in the cans for other uses, like smoothies.
- Start by whipping the coconut cream alone for about 30-45 seconds with an electric mixer at maximum speed.
- Then, add the rest of the ingredients and beat for another 30 seconds or until everything is well combined and creamy.
- Serve with fruits or top your morning oatmeal. This whipped cream is especially delicious with simple sliced apples!
Notes
- Choosing full fat canned coconut milk is important to get a successful thick whipped cream.
- Don't forget to chill the cans before whipping. Just keep a few cans in the fridge at all times so you are always ready to whip up an easy fruit topping!
- Nutrition: please note that the nutritional information is an estimate per serving provided for informational purposes only (calculated by software) and accuracy is not guaranteed. Consult with your healthcare provider or a registered dietitian if you need precise nutrition calculations for health reasons.


Was easy to make and delicious.