These healthy almond flour thumbprint cookies are so fun to make and easy too! They only require 7 simple ingredients and are so amazingly soft and tender with just the right amount of almond flavor. They make for very joyful and appetizing vegan cookies to serve during any holiday, especially Christmas!

As we are entering the holiday season, all I want to do is make Christmas desserts! Our favorites are these vegan pineapple upside-down cake, no-bake peanut butter fudge and chocolate orange cake, but these delicious almond flour thumbprint cookies are such a classic, we make them every year!
When I make a batch of these vegan and gluten-free thumbprint cookies, they usually are all gone within 20 minutes! They are soft and tender yet have the most amazing crispy edges. And not to mention the combination with fruit jam that makes them so special and colorful.
Feel free to play around with the colors of the jam to match any festivity, such as Christmas, Valentine's Day, Easter or Mother's Day! A perfect last-minute and very festive vegan cookie.
Happy baking! ❤️
Jump to:
- ❤️ Why you will love this recipe
- ➡️ Thumbprint cookies made with almond flour
- 🗒 Ingredient notes (+ substitutions)
- 🍽 How to make almond flour thumbprint cookies
- 💡 Baking tips
- ✅ Other filling ingredients and ideas for decorating thumbprint cookies
- ❗️Storage tips
- ❓ FAQs
- 🌱 More almond flour dessert recipes to try
- 📖 Recipe
- Pin it for later!
❤️ Why you will love this recipe
- So easy to make and quick too!
- Versatile: use your favorite jam, whether it is store-bought or homemade.
- Amazing cookie recipe for Christmas or any celebration.
- Vegan, gluten-free, egg-free and dairy-free
➡️ Thumbprint cookies made with almond flour
Almond flour is easy to work with and also makes for a good choice in baking when following a gluten-free diet. It also makes for the perfect texture: moist and softer yet with a crispier outside (just like in these coffee bean cookies). Plus, it provides rich, nutty and almost buttery-flavored cookies.
Choose a blanched (meaning skins off) and fine almond flour (avoid coarse almond meal) as they will give these cookies that perfectly delicate texture you are looking for.
For more almond flour cookie recipes, check out these 3-ingredient banana cookies and these peanut butter almond flour cookies!
🗒 Ingredient notes (+ substitutions)

- Almond flour: I used the blanched and fine almond flour for the best result (I used the almond flour from Bob's Red Mill).
- Oat flour: Just a small amount to balance the texture of the cookies (almond flour is very rich and high in fat). If you do not have oat flour, then you can grind rolled oats for a few minutes or until it is as fine as you can.
- Coconut oil: or swap for vegan butter. I used refined coconut oil so the cookies don't have a coconut-y flavor.
- Maple syrup: sweetener of choice, but agave nectar should work too. Do not swap for granulated sugar.
- Almond extract: optional, so skip if you don't have it, but highly recommended as it adds that amazing almond flavor. In a pinch, just use vanilla extract instead.
- Jam of your choice: I used homemade chia seed jam, but feel free to use store-bought jam if that's easier!
⭐️ Full list of ingredients (+ quantities) down below in the recipe card!
🍽 How to make almond flour thumbprint cookies
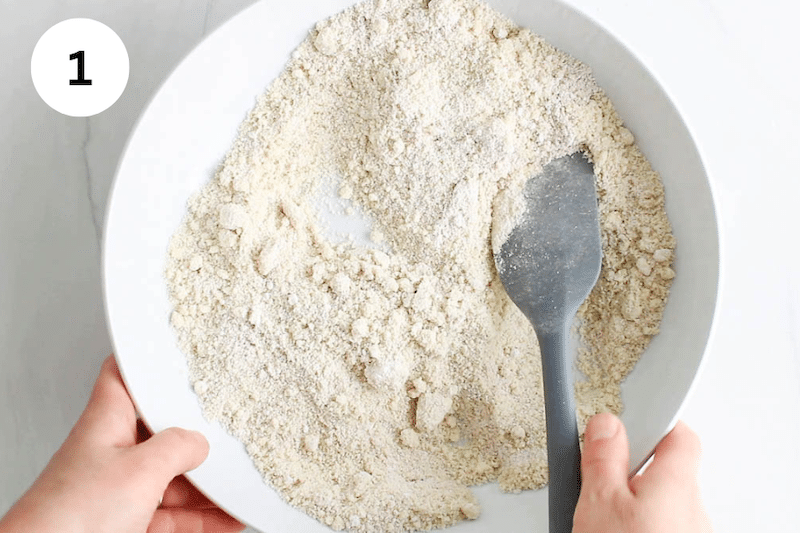
Step 1: Combine the dry ingredients (almond flour, oat flour and baking powder) in a large mixing bowl.
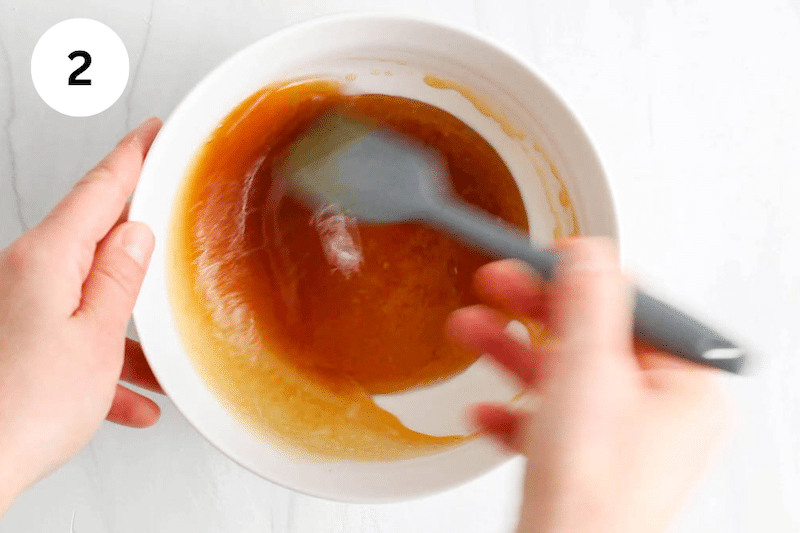
Step 2: Combine the wet ingredients (melted coconut oil, maple syrup, almond extract and plant milk) in another medium bowl. Stir or whisk well until it forms a uniform consistency.
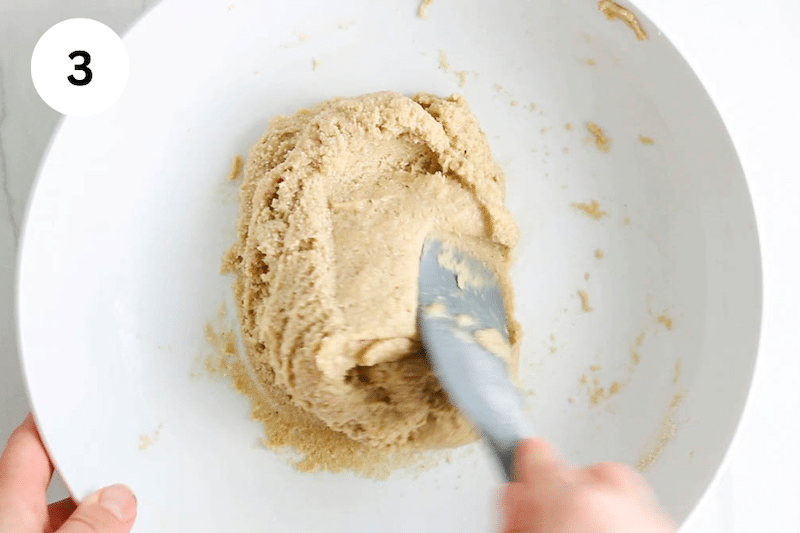
Step 3: Pour the wet over the dry and combine. It might look a little dry at first, but keep stirring until it forms a large moist ball. I like to use a spatula to help break the almond flour clumps when mixing.
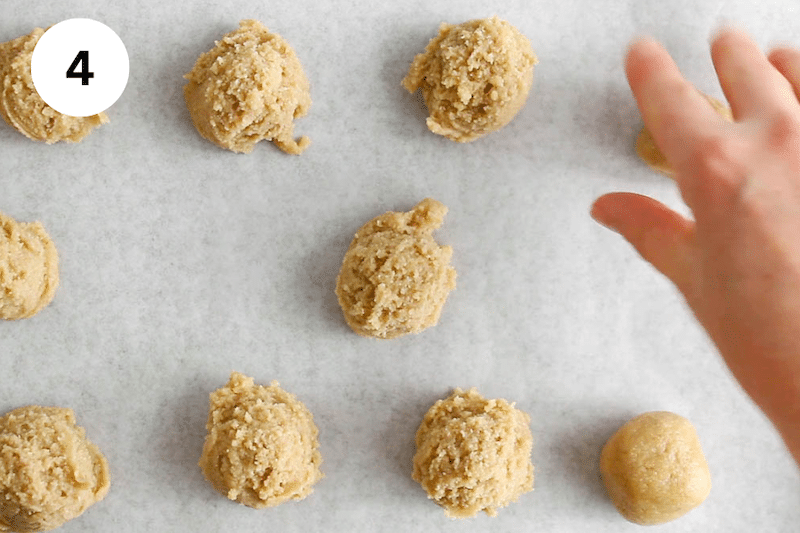
Step 4: Divide the dough into 12 equal portions (I like to use a small ice cream scoop for this) and roll them in between your palms so it forms smooth balls. Place them on a parchment paper-covered baking sheet as you go.
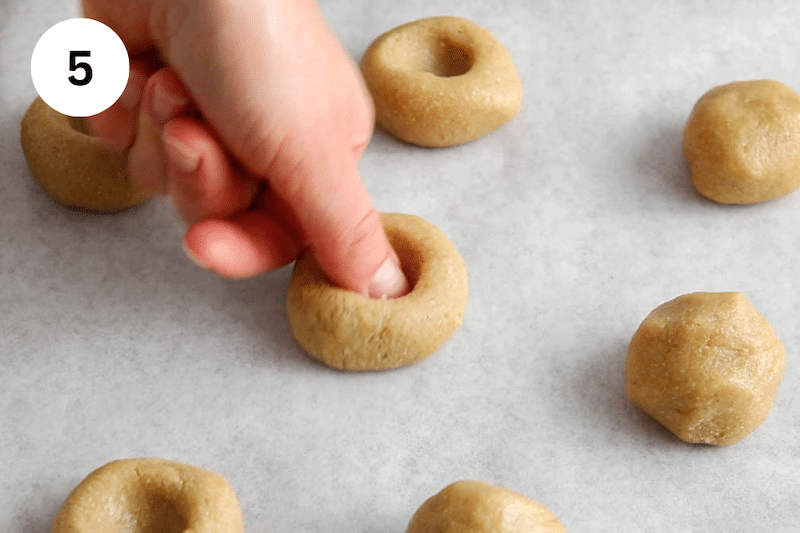
Step 5: Using your thumb or the back of a measuring teaspoon, create a hole/cavity right in the middle of each ball. They will expand slightly as you do that (and might crack a bit, that's fine). Also, don't go all the way through them so the jam does not leak.
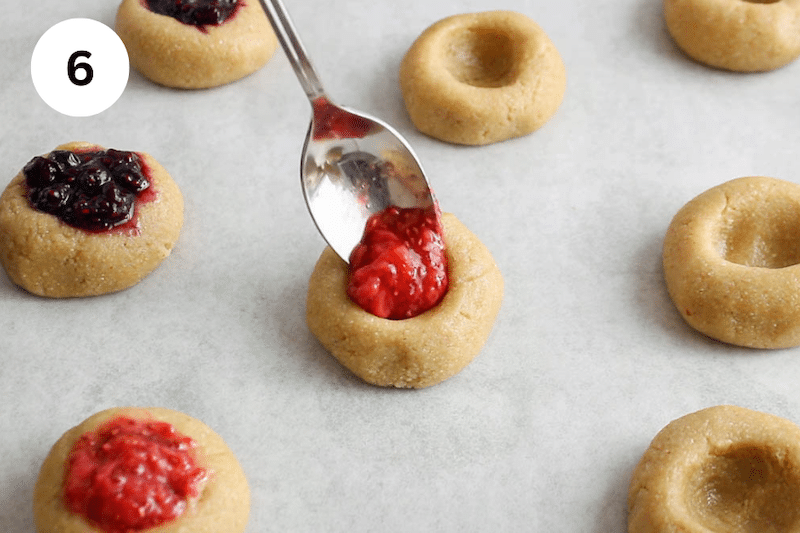
Step 6: Fill the cavities with your jam (you might not want to go all the way to the top so it does not leak as it bakes). Bake for 9-10 minutes. I usually go for 9 minutes, as I like them softer, smooth and pale-ish. But, aim for 10 minutes if you want them on the crispier side. Watch them carefully! Let them cool down for 10 minutes before enjoying.
⭐️ Detailed recipe (+ video) down below in the recipe card!
💡 Baking tips
- They will be very soft right after baking. Don't touch them! Let them rest on the baking sheet for at least 10 minutes before enjoying so you can fully appreciate their amazing texture.
- They also cook very quickly, 9-10 minutes is plenty. Take them out when they start to brown, but they will mostly remain light in color.
- If you don't have almond extract, then try adding vanilla extract instead. Cinnamon, cardamom or a touch of lemon zest would be good ways to flavor them as well.
- Depending on your jam, it might fade in color while baking. Add a little more jam once out of the oven to brighten up their color.
- I haven't tried it, but you could try rolling the balls in finely chopped nuts before making the cave and filling with jam. It would add some more texture and a crunch. Try using almonds or walnuts, but make sure the nuts are crushed so they stick well to the dough.

✅ Other filling ingredients and ideas for decorating thumbprint cookies
Try out other filling as well! Use a date caramel, vegan chocolate sauce or even fill the cavities with a few mini chocolate chips. Also, try cherry pie filling, combine some peanut butter + jam for a PB&J version or any vegan icing (add after the cookies are baked), if you already have some ready to go.
Or, let the holes empty while baking, let them completely cool down and fill them with coconut whipped cream or a dark chocolate frosting!
You could also roll the cookie ball into sugar or crushed nuts before creating the holes with your thumbs.
❗️Storage tips
Almond flour absorbs moisture very easily, which is why it is better to keep them in a dry-ish area so they don't become too soft or sticky.
Keep them at room temperature for up to 5 days. Also, you might want to leave your container slightly opened, again, so the moisture doesn't get trapped and alter their texture too much. Avoid the refrigerator too as the cookies would soften too much.
You can freeze them, but expect some changes in texture after thawing.

❓ FAQs
Coconut oil is the kind of oil you will need to make these cookies. It is solid at room temperature or after being chilled, which sets it apart from other kinds of oils. Coconut is essential to get that perfectly chewy and soft texture, so do not swap for any other kind of oil. If you don't have coconut oil, then use vegan butter!
No. Almond flour is very different than all-purpose flour: heavier and has more moisture (or fats). If using all-purpose flour, then you would end up with a very different texture that might not work well.
You can do both. I usually add the jam before baking and if I find the jam too dry after getting out of the oven, then I add a little more over.
Jam-filled thumbprint cookies tend to be a little more delicate, so a nice box would be a good choice to keep them from breaking too easily. Or, use pill them in a large glass jar and decorate with a decorative ribbon.

🌱 More almond flour dessert recipes to try


I hope you enjoy these almond flour thumbprint cookies as much as we do! If you try them, please leave a comment below and rate the recipe to let me know how they were. Your feedback is so helpful!
Let's stay in touch with Instagram, Pinterest and Facebook. Also, don't forget to subscribe to my newsletter to be sure not to miss anything.
📖 Recipe

Almond Flour Thumbprint Cookies (Gluten-Free & Vegan)
Ingredients
- 1 ½ cup almond flour - finely ground and blanched
- ¾ cup oat flour
- ½ tsp baking powder
- 1 tsp almond extract - can swap for vanilla extract
- ¼ cup maple syrup
- 3 tbsp coconut oil - melted
- 1 tbsp plant milk
- jam of your choice
Instructions
- Preheat the oven to 350ºF. Line a baking sheet with parchment paper.
- In a large bowl, combine the almond flour, oat flour and baking powder.
- In a medium bowl, melt the coconut oil (I use the microwave) and then add the maple syrup, plant milk and almond extract (or vanilla extract). Whisk well until it becomes uniform.
- Pour the wet ingredient over the dry and combine the batter. It might look dry at first, but keep stirring until it forms a large moist ball of dough. Make sure to break up all the almond flour clumps as you stir.
- Divide the dough in 12 equal portions (I like to use my small ice cream scoop) and shape them in balls by rolling in between your hands. Then, place them on the prepared baking sheet.
- Using your thumb or the back of a measuring teaspoon, press in the middle of each ball to create a cavity (don't go all the way through!).
- Fill the cavity with the jam of your choice. If your jam is thinner, then don't go all the way to the top so it does not leak on the sides (although it's fine if it leaks, it gives them a nice rustic look!).
- Bake in the oven for 9-10 minutes or until they start to turn golden brown (although they should remain mostly pale). Once they are baked, let the cookies COOL DOWN for at least 10-15 minutes before enjoying (they will be VERY SOFT when just out of the oven). Enjoy!
Video

Notes
- Do not use any other kind of oil. Coconut oil is essential for best texture. Choose a refined coconut oil to avoid coconut flavor.
- Storage: almond flour absorbs moisture easily, so keep them at room temperature for up to 5 days in a dry-ish place so they don't soften too much. Try to keep your container half opened as well so you don't trap moisture inside. Avoid storing them in the fridge: they will soften or even get sticky. You can freeze them if you must, but expect a change in texture after thawed.
- Use your favorite jam! I used my own homemade chia jam, but any store-bought jam will work. Try filling them with chocolate chips, date caramel, peanut butter + jam, or marmalade. If the filling fades while baking, simply top with more after out of the oven.
- Nutrition: please note that the nutritional information is an estimate per serving provided for informational purposes only (calculated by software) and accuracy is not guaranteed. Consult with your healthcare provider or a registered dietitian if you need precise nutrition calculations for health reasons.
NUTRITION
Pin it for later!


I couldn't see whether to leave them to completely cool on the tray, or leave for a little while and transfer to a rack - sometimes leaving them on the tray makes them soggy - please advise??
Hi Marion, I usually let them cool down a little bit on the tray since they are pretty soft while still hot. Hope this is helpful! 😊
Thank you for the great recipe! It is very simple and totally satisfying. I will definitely be making these again soon .
Hi Andrea! Thanks you for sharing, I'm glad you liked them! 🙂
It's hard to stress how good these cookies are and how easy they are to make. I have made them 3 times now and they are my favorite cookie. The texture is just right and they are perfect with my cup of tea. Just the right amount of sweetness.
Oh that sounds great, thanks for your comment Nancy!