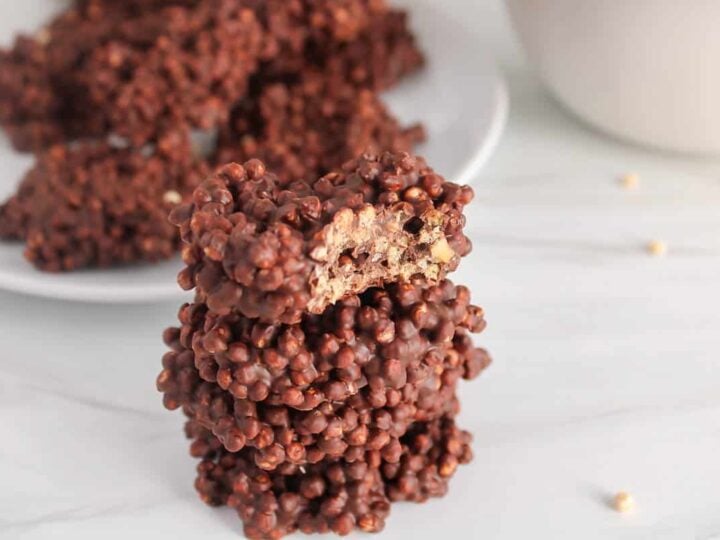
These vegan scones are perfectly crispy on the outside, flaky & tender on the inside and filled with sweet caramelized pieces of dates. Such a treat! This is a quick & easy recipe that only requires 7 simple ingredients, all done in under 30 minutes and also that's made healthier! 100% vegan, dairy-free and made without butter.

I used to think that making vegan scones at home was tricky or the kind of treat you would only get at the corner bakery. But I was wrong! Making scones from scratch is actually super easy and even pretty quick!
And these date scones are SO delicious: they have flaky + moist middles that are studded with sweet and caramelized dates and they have great crispy edges, perfect to dip in an aromatic cup of milk tea or a steamy cup of cardamom latte.
Scones are actually one of my favorite breakfast treat, side baked good at brunch or afternoon snack! They are perfect serve with a batch of blueberry jam or an easy date caramel dip.
They can also be all made under 30 minutes, from mixing in the bowl to fully baked, but they are also very easy to make ahead. You can even freeze a large batch to always be ready to serve freshly baked scones in minutes!
It is also a surprisingly simple recipe: all they include is flour, coconut oil, a little maple syrup and plant milk, chopped dates, some chia seeds and baking powder. All of them are simple ingredients you might already have in your pantry!
This is a recipe that's made without using any eggs, dairy product or even butter (no vegan butter either!). I also used a whole wheat flour to make it a little healthier, but you can use spelt flour or regular all purpose flour to make them.
Plus, adding chopped dates to the scone recipe helps use less sweetener when making the dough. They have such a nice caramel-like flavor, which pairs very well with a scone that's only slightly sweet. Also, they add a lot of texture with their chewy & caramelized candy-like pieces of fruit within the flaky dough, so delicious.
Also, instead of butter, which is an important ingredient when making classic scones, I got inspired by my lemon cookie and made these vegan scones using coconut oil. It mimics the solid texture of butter to help create the dough, but also, coconut oil acts similarly to butter when baking and helps keep the moisture in the baked good. This makes sure the scones are nicely crispy and perfectly crumbly in texture!
Let me know if you gave them a try! ❤️

What's the difference between scones and biscuits?
Scones and biscuits have a lot of ingredients in common, but are different.
Biscuits are light, flaky, airy and more buttery with a hint of acidity coming from the buttermilk. They taste more savory than scones and hold together better when dipped in gravy and sauces.
Scones are flaky as well, but more crumbly and sweeter. They might feel dryer too, yet should not be dry at all. They are usually meant to enjoy with a warm beverage, such as tea of coffee.
Highlights of this recipe
- Easy recipe made with simple ingredients
- Perfect recipe for tea parties, brunch treat or to serve for Mother's day or Easter
- Quick to prepare: should be done within 30 minutes!
- Healthier recipe made with coconut oil instead of butter and whole wheat flour
- Versatile: you can swap the dates for other fruits!
- 100% vegan, dairy-free, egg-free and nut-free
Ingredients to make date scones
You'll only need 7 ingredients to make these fluffy and moist date scones:
- Flour: I love to use this white whole wheat flour from King Arthur when baking, but regular all purpose flour will work too.
- Medjool dates: make sure to use soft & large Medjool dates for best results. They add texture but also a nice sweet caramel taste to the scones.
- Baking powder: leveling agent to help puff the scones.
- Maple syrup: will slightly sweeten up the scones, but agave nectar should work too. I don't recommend using granulated sugar.
- Chia seeds: perfect for egg-free scones! Mixing chia with water will create a gel-like mixture that resemble and act like eggs.
- Coconut oil: choose refined coconut oil to avoid any coconut flavor.
- Plant-based milk: I used almond milk, but any kinds will work, such as soy milk or oat milk.

How to make these easy date scones
Get ready
Before getting started, here are a few things you should do:
- Measure the coconut oil and transfer to the fridge to allow it to chill and firm up a bit, especially important if in the summer and the coconut oil is liquid-y or super soft (you are looking for a texture that's similar to butter!).
- Make the chia egg by combining the chia seeds with the water. Set aside to set, about 5 minutes.
- Line a baking sheet with parchment paper and pre-heat the oven to 375º.
Prepare the dough
Then, in the food processor, add the flour, baking powder and salt. Process just so it's combined.
Then, add the chilled coconut oil by scattering small pieces over the flour using your fingers (this will prevent over-processing). Pulse a few times just to break up the coconut oil in smaller pieces, while making sure you keep some chunks of oil intact (do not process to a smooth texture, you are looking for a dry crumbly texture).
Transfer the flour-oil to a bowl and add the rest of the ingredients (maple syrup, milk, chia egg and dates). Start to combine the ingredients with a spoon, then use your hands to ensure all the ingredients are incorporated together. DO NOT OVER PROCESS THE DOUGH. You want to make sure you keep some pieces of coconut oil intact, so combine just until smooth-ish, but still a coarse and crumbly mixture.
Roughly form a ball with the dough into the bowl, then transfer to the baking sheet.
Shape and bake
Using your hands, form a disc of about 8 inches, right on the baking sheet. Flatten the disc using your hands so it's about uniform. The dough will be sticky, it's normal.
Then, cut the disc into 8 triangles (like pizza slices) and simply space out the scones on the baking sheet so they don't touch each other.
Bake in the oven for about 17-18 minutes, or until slightly browned on top.
Let the scones rest and slightly cool down before enjoying.


Tips to make the BEST vegan date scones
- You really don't want to work the dough too much. Once the ingredients are combined, then don't manipulate anymore. This will ensure you keep some pieces of coconut oil intact, which is crucial to avoid ending up with scones that are too dense or worst, hard.
- Make sure your ingredients are cold, mostly the plant-based milk and coconut oil. You do not want melted oil in the dough. You could also try chilling the dough right before baking them (put the whole baking sheet in the fridge) if you realized the dough is a little over processed.
- To prevent having to process the dough for too long, then I recommend to distribute the chilled coconut oil in small pieces in the food processor. Then, you will only have to pulse a few times to break up the chunks, opposed to having to process for longer to break one large block of oil (remember, you want scattered small pieces of oil all over the dough).
- The dough is sticky, so you can gently flour your knife before dividing the disc into 8 scones so it does not stick to the knife.
- You can wash the scones with plant-based milk before baking for a crispier and more golden brown finish.


Variations to the recipe
These easy vegan scones are so delicious just as is and to my taste, perfectly sweet too. But you can adapt the recipe to make it yours
- Make some date and orange scones by adding the zest of one large orange to the dough. Also add some more zest over the scones at serving.
- Swap the dates for blueberries or raspberries.
- For a nice treat, then also add chocolate chips.
- Make some walnut and date scones by adding a handful of roughly chopped walnuts to the dough. Pecans would also work great.
- Add some spices to the food processor alongside with the flour, like cinnamon or cardamom.
- You can also brush with plant milk the scones and then sprinkle with some coconut sugar before baking for added sweet flavor.
Serving suggestions
Scones are definitively an amazing sweet treat to serve at brunch, baby showers, Mother's day, or simply for the afternoon snack served with warm tea. I love how they are sweet enough for dessert, but also not overly sweet, so they make for a nice healthy snack or breakfast.
They are also great with a vanilla matcha latte, a cardamom latte or a peanut butter coffee. For kids, then serve with an oat milk hot chocolate!
Scones are also typically served alongside with fruit jam and butter. They would make for a great match with this cherry marmalade or a blueberry chia jam, like seen in the picture.
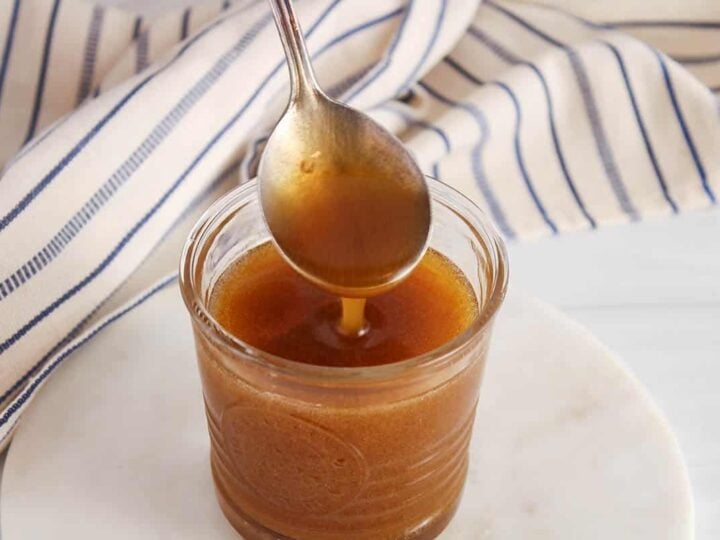
If you are up for a nice treat, then generously spread a date caramel sauce over your scones. Also drizzle a generous amount of this healthy vanilla glaze or vegan chocolate sauce over or add a dollop of vegan coconut whipped cream or vegan mascarpone!

Storage tips
The scones are at their best when freshly baked, so I would recommend to try eat them within 24 hours. If you have to store them for longer then one day, then transfer in an air-tight container and keep them in the fridge. They will lose on some of their nice crispy crust, but will still be tender, moist and delicious.
If you know already that 8 scones won't be eaten within 24 hours, then what I recommend to do is to prepare the dough and cut the scone as described, but only bake the scones you will need. Transfer the remaining uncooked triangle shaped scones on a plate (covered with parchment paper first), then freeze. Once frozen (3-4 hours), transfer them to a container or bag for longer storage (up to 3 months).
How to bake the frozen uncooked scones
Straight from the freezer, transfer the raw scones to a baking sheet covered with parchment paper. Then, bake for 20 minutes at 375 º (instead of 17 min). They should get nice and crispy and golden brown just the same as if they were cooked fresh.
It is then easy to double (or triple!) the recipe and freeze many uncooked scones and bake a few once in while if a scone craving arrives or for the spontaneous visit from a friend!

Other healthy baked goods you might like
- Almond flour banana muffins
- Vegan strawberry muffins
- Mini matcha brownies
- Strawberry chocolate bars
- Vegan chocolate chip oatmeal cookies
- Cinnamon oatmeal cookies
- Vegan blackberry muffins
I hope you enjoy these vegan scones as much as we do! If you try them, please leave a comment below and rate the recipe to let me know how they were. Your feedback is so helpful!
Let's stay in touch with Instagram, Pinterest and Facebook. Also, don't forget to subscribe to my newsletter to be sure not to miss anything.
📖 Recipe

Vegan Scones
Equipment
- Food processor
Ingredients
- 1 tsp chia seeds - + 2 tbsp water
- 2 cups white whole wheat flour
- 3 tsp baking powder
- pinch of salt
- ¼ cup coconut oil - cooled down in the fridge first
- ⅓ cup maple syrup
- ½ cup vegan milk
- 1 cup medjool dates (about 10-12) - pitted and chopped
Instructions
- Start by measuring the coconut oil, then transfer to the fridge to chill.
- Prepare the chia egg by combining the chia seeds with the water. Set aside.
- Pre-heat the oven to 375 º. Line a baking sheet with parchment paper
- Once the coconut oil is completely cooled down, use a food processor to process the flour, baking powder and salt just until combined. Then, break down or cut the cold coconut oil in smaller pieces and distribute in the food processor. Then, pulse only a few times until the oil is mostly broken down, but not completely dissolved in the flour. You want to avoid processing for a long time so the oil is not warming up. Once you have a mixture mostly combined with small chunks of oil, then stop processing and transfer to a large bowl.
- Add the maple syrup, milk, chia egg and dates. Stir until combined and use your hands once the dough gets thicker to make sure everything is well combined (again, do not overmix or completely dissolve the oil as you want to keep a few small clumps of oil). The dough will be sticky and easily form a large ball.
- Transfer the ball of dough to the prepared baking sheet and form a disc of about 8 inches wide using your hands. Then, divide in 8 pieces (shape of pizza slices) and space the triangles away from each other on the baking sheet.
- Bake for 17 minutes or until lightly browned on top.
Video

Notes
- You really don't want to work the dough too much. Once the ingredients are combined, then don't manipulate anymore.
- Make sure your ingredients are cold, mostly the vegan milk and coconut oil. You do not want melted oil in the dough. If you wonder if your coconut oil got too warmed up, then you could try chilling the scones before baking them.
- The dough is sticky, so you can gently flour your knife before dividing the disc into 8 scones so it does not stick to the knife.
- STORAGE: The scones are at their best when just baked, so I recommend to eat within 24 hours. Store in the fridge in an air-tight container if storing for longer than a day (the scones will lose on their crispy edges).
- PRO BAKING TIPS: Once you divided the disc in 8 pieces, then only bake the ones you want to eat within the day. Transfer the remaining ones on a parchment paper covered plate, then freeze (3-4 hours on the plate, then transfer to a bag for longer storage). When you want to bake the frozen raw scones, transfer them straight from the freezer onto a baking sheet (also covered with parchment paper), then bake at 375º for 20 minutes.
- Nutrition: please note that the nutritional information is an estimate per serving provided for informational purposes only (calculated by software) and accuracy is not guaranteed. Consult with your healthcare provider or a registered dietitian if you need precise nutrition calculations for health reasons.
NUTRITION
Pin it for later!


Hi Jessica,
I am thrilled I found a healthy scone recipe. I cannot have coconut oil because of the high saturated fats. I really want to make this recipe can I use canola oil? Don't want to use butter or vegan butter. I had a scone on Mothers Day at a restaurant (which I am sure was not healthy) but want to try making these.
Thanks,
Hi Cheryl! Thanks for your comment. Coconut oil is very unique for its solid form at room temperature, which is hard to replace for other oils, such as canola oil. I don't think the result would be the same, I'm sorry!
Hi Jessica,
I made them today and use Imperial Margarine only because it has low saturated fat. I usually don't bake with it but had it hand and worth a try.
I also added some walnuts. Its not vegan but I am very pleased as it has no egg as my granddaughter is allergic and used almond milk. Thanks again for the great recipe!
Oh that sounds great! Thanks so much for sharing! 🙂
These were really divine. I also used high grade flour with a dash of vanilla added and they were perfect. Such an easy simple recipe that tastes exactly how I remember scones to be. Thank you.
Hi Mel! Thank you so much for your comment, I'm glad you liked them! 🙂
I made a variation of this awesome scones. I ran out of whole wheat flour and used high grade flour instead, they get much softer and juicer that way 😊. Adds a bit of cinnamon and vanilla for more flavour. I had to use my date paste up so rolled the dough out and spread the date past pus additional chopped one’s on it and rolled it up like cinnamon roles. I cut them in 8 pieces and pressed them slightly to disks. The ere super soft, juicy scones. They were gone in no time
Oh great, this sounds amazing! Thanks for your comment 🙂