Learn how to make vegan tortillas from scratch with this simple homemade recipe! Made using whole wheat flour for a healthy and more filling tortilla wrap recipe, plus everyone can make them, they are so easy!
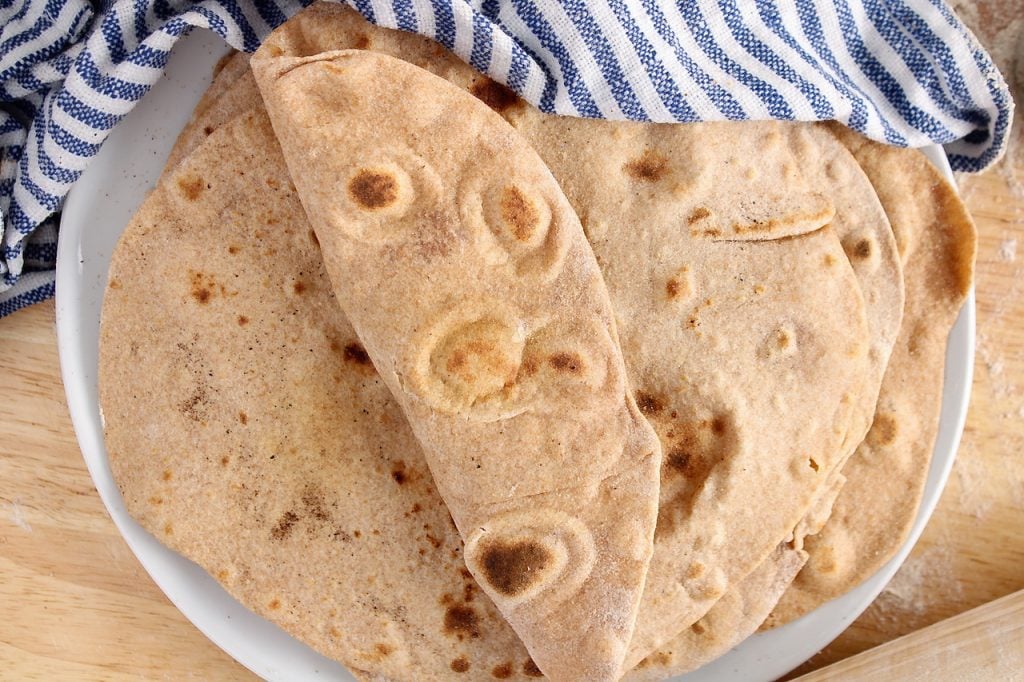
It might sound surprising, but making your own tortilla wraps right at home is super easy and so much better than the store bought ones. These have a pillowy and soft texture that's amazing plus, their hearty flavor is something you can only experience by making them yourself.
But more importantly, making your own tortillas is super satisfying and such a rewarding process. You will need a little time ahead of you to make them as the dough needs to rest for some time, but kneading, rolling and pan cooking your own tortillas is so much fun!
Are tortillas always vegan?
Although it is quite easy to make vegan tortillas, a classic tortilla recipe will often include butter or lard, which is 100% animal fat.
You can veganize tortillas by using vegan butter or vegetable oil. I love to use coconut oil when baking, so this is the kind of oil I recommend you to use. Choose refined coconut oil so your tortillas don't taste like coconut and melt it first (it is solid at room temperature) so it combines well with the rest of the ingredients.
If you choose to use a different kind of vegetable oil, then aim for a neutral tasting oil for best results.
Ingredients you'll need
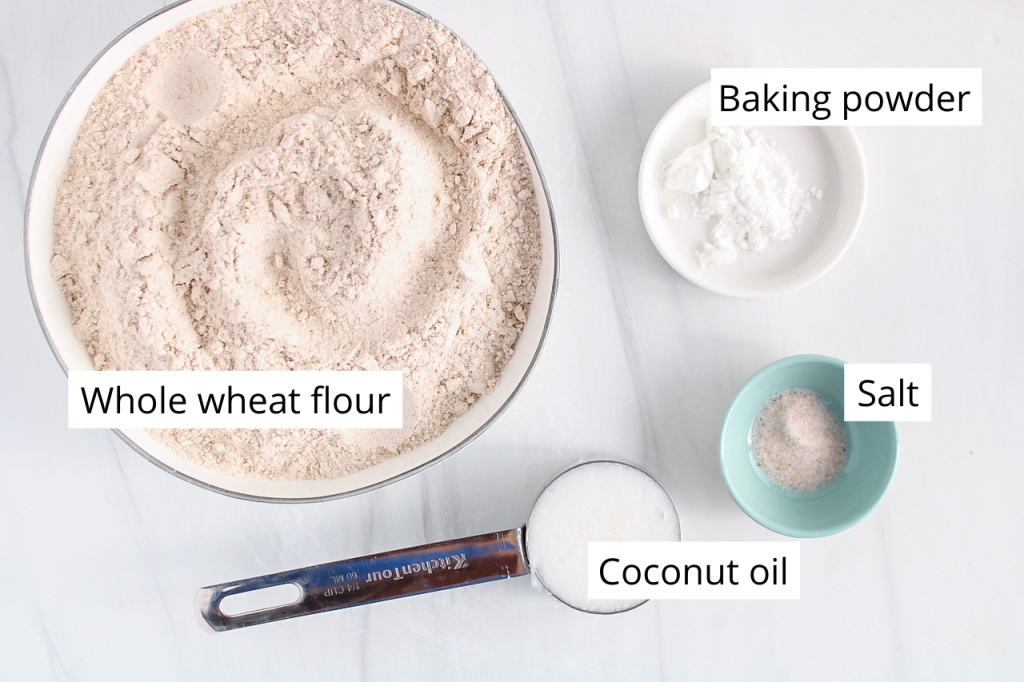
Although it will take a little time to make, these vegan tortillas require only a handful of simple ingredients that you probably already have in your pantry.
- Whole wheat flour (I use the whole wheat flour from Bob's Red Mill)
- Baking powder
- Salt
- Refined coconut oil
- Warm water (not boiling)
Why use baking powder
You will find some tortilla recipes with or without the baking powder, which usually depends on personal preference.
Baking powder acts as a leveling agent, similar to yeast when making bread. This helps "puff" the tortilla and makes them fluffy and pillowy.
How to make them: Step-by-Step
Making your own vegan tortillas from scratch is really not that hard and SO MUCH BETTER than the store bought ones! It does take some time as you have to knead the dough, rest the dough/tortillas, plus each of the tortillas has to be cooked individually, although they cook super quickly! Rest assured that all that work will totally be worth it!
Step 1: Prepare the dough
Combine the whole wheat flour with the baking powder and salt. Then, add the warm water and melted coconut oil. Stir until it forms a rough ball of dough. You can also use your hands to do a quick knead right in the bowl to help the dough come together.
Step 2: Knead the dough
Transfer the ball of dough on a clean and lightly floured surface and knead the dough for at least 5 minutes. Put a timer on! You are looking for a super smooth dough that feels elastic when pulling on it.
Step 3: Divide the dough and rest
Then, divide the dough in 8 equal portions and roll them in between your hands to form balls. Place them on a lightly floured surface and cover them with a damp towel. Let them rest for at least 30 minutes.
Step 4: Roll into tortillas
Taking one ball at the time and using a rolling pin, shape the balls into large thin disc by rolling them (about 8 inches large). Try to get them pretty thin.
Watch the video to see how I do it, but to summarize: roll, then rotate the disc ¼ of a circle, then roll again, then rotate another ¼ of a circle, and repeat. Keep going until you reach a large and thin flat dough. Don't stress over getting your discs perfectly circular, we are making rustic homemade wraps!
While you are shaping one of the balls into a disc, then you have to keep the other ball of dough under the damp towel so they don't dry out.
Step 5: Cook the tortillas
Start by warming up a cast iron or non-stick pan on medium heat. Once heated, then transfer the flat rolled disc on the pan (don't grease the pan for best texture) and cook for 1 minute on each side.
It might take some practice when first starting to make the tortillas, but once you get the hang of it, it is so easy and quick. Try to keep your heat on medium to start with and once you transfer your tortilla, you should see many bubbles forming within a minute, then flip and cook for about another minute on the other side. I will often lift the sides to check on the tortilla and make sure it's not turning a darker brown too fast.
If the bubbles appear too fast, then turn down your heat so it does not burn. On the other hand, if you don't see any bubbles (or barely any) even after one minute, then you have to turn your heat up a bit (cooking for too long can turn your tortillas too dry!).
Step 6: Steam and serve
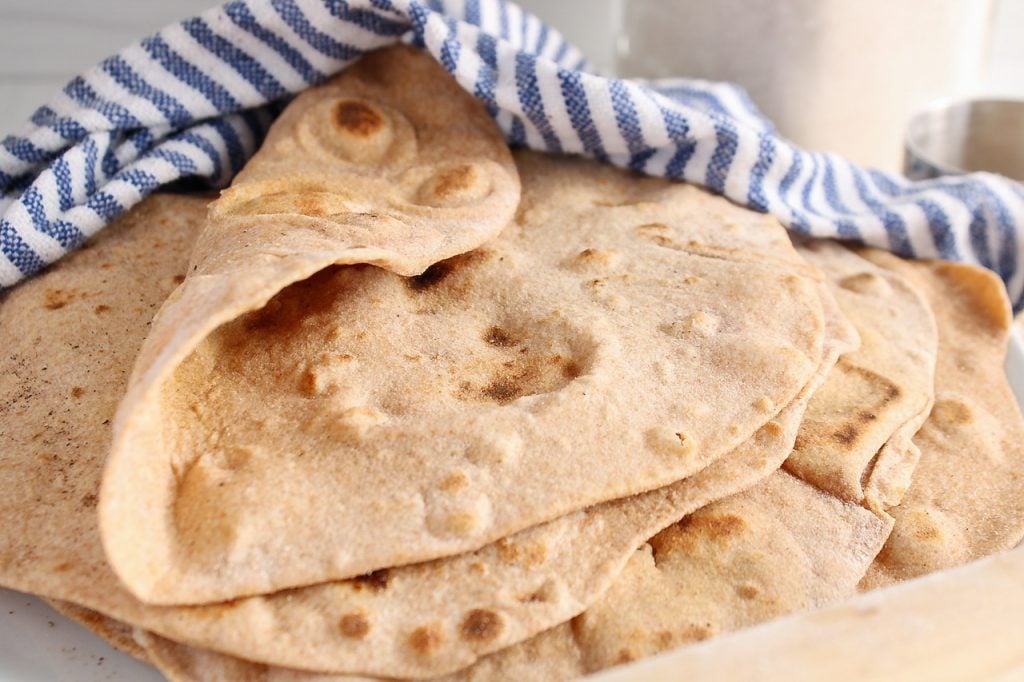
Once your tortilla is done cooking, it might feel not that soft. You have to steam them to help create a soft and puffy amazing texture. Simply transfer the tortillas as you cook them right away under a second damp towel and let it rest for at least 30 minutes (count 30 minutes from the last tortilla!). They will get super soft!


Watch how to make them

How to make your tortillas super fluffy and soft
I love how these homemade tortillas are super soft and tender, even if using 100% whole wheat flour and no butter. Here are a few tips to make the BEST tortillas:
- Use hot water (not boiling): this is important! It results in a dough that's super soft and tender.
- Cover the dough all-the-time with a damp towel: this prevents them to dry out and keeps moisture in to make the tortillas more pliable.
- Respect the resting time: this allows the flour to hydrate well and retain the moisture.
- Knead well: take your time when kneading and be sure to knead for at least 5 minutes! This will incorporate some air into the dough to make super fluffy tortillas. Put a timer on so you don't skip this step.
- Steam the cooked tortillas: also essential to soften your tortillas. Right after cooked, they might feel a little crispy, but stack them on top of each other while they are still super hot and cover with a damp towel to create steam. Let them steam for at least 30 minutes or more!
Get organized to optimize your time
Once the 8 balls of dough are done resting, then it's time to cook them into tortillas!
There are 3 general steps into finalizing the tortillas: 1- Rolling, 2- Cooking, 3- Steaming.
To make a good use of your time and avoid any down time, I recommend you do all these steps at the same time, opposed to rolling all the balls, then cooking them all, etc.
So, warm up the pan and get a second towel damp (you should already have one covering your balls of dough).
Then start the process: roll your first tortilla (keep the other balls always covered) and then cook it. While it's cooking, then roll the second tortilla while keeping an eye on the one that's cooking. When done cooking, transfer under the second wet towel to start the steaming process. Transfer the disc that you just rolled to the hot pan and roll another ball, etc. Keep going until you use all the dough. Let them steam for about 30 minutes or until they get nice and soft!

Extra recipe notes
- You can add a little amount of flour when kneading if the dough feels too sticky, but be conservative as you don't want to create tortillas that are too dry.
- Make sure to heat the pan before you add the tortillas to it or it might stick.
- As described above in the step-by-step description, play around with the heat when cooking your tortillas. My first tortilla is never the best, but that's fine because it actually helps me adjust the heat for the next ones (check out step 5 on how to cook the tortillas). You want to avoid overcooking and are looking for light brown spots, without burning or becoming too crispy.
- Be sure to use REFINED coconut oil to avoid coconut flavoring.
Can I make street size mini tacos with the dough?
You can definitively shape the dough in whatever sized tacos you need. What really matters is the thickness of the disc: it needs to be super thin so it cooks well.
So, if you are looking for smaller taco size, then divide the kneaded dough into 16 balls instead of 8 and proceed with the recipe the same way. It will take you longer to cook them all, unless you can fit more than one on your pan!
Then, stuff your mini tortillas with this lentil walnut taco meat, yum!
What kind of pan to use
Traditional Mexican tortillas are cooked on a flat griddle (comal). I assume most of us don't have one, but don't worry, you can still make some!
The second best choice is a cast-iron pan as it gets the tortillas nice and soft (especially after steaming).
If you don't have a cast-iron pan, then simply use a non-stick pan. I did test them with a non-stick pan and really, it was fine, although they might have been a little more stiff.
In any case, don't grease your pan! This is not for health reasons: the fat on the pan will crisp your tortillas!
Storage tips
Take extra precaution when storing the tortillas as they can dry out easily.
Be sure to keep them in an air-tight container or large ziploc bag so no air can be in contact with the tortillas.
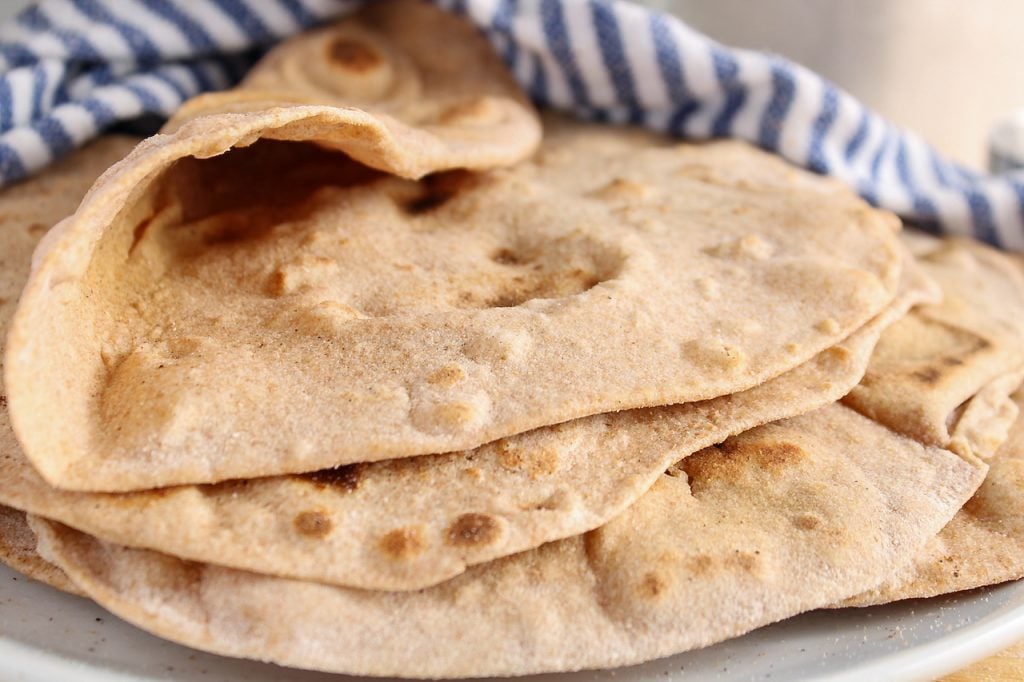
Keep them in the fridge for up to 5 days. The tortillas will harden and feel more stiff when they cool down in the fridge, but will regain their soft texture after warmed up if stored properly.
Can I freeze them?
They freeze well too if you want to have freshly made tortillas at any time.
Keep in the freezer for up to 6 months. Just the same as storing in the fridge, be sure to keep them in air-tight containers or Ziploc bags.
To allow you to get only a few at the time while frozen, then be sure to separate each of the tortillas with a sheet of parchment paper.
To defrost, let them warm up at room temperature or transfer the day before you need them in the fridge.
Reheating tips
The tortillas are best when slightly warmed up as they will get softer with a pillowy texture (they get stiffer after being in the fridge).
The best way to re-heat your tortilla is simply by warming them in a cast iron pan (or the pan you used to cook them). Only warm them for a few seconds on each side and also cover for a little bit with a moist towel to help soften them.
If you have many tortillas to warm up at the same time, then you can also use your oven: pre-heat the oven to 350º, stack your tortillas on top of each other and completely wrap them up with aluminum foil. Then, warm up for 10-15 minutes or as needed.
And at last, I know this is not proper technique, but when I'm in a rush, then I'll just wrap them with damp paper towels and warm up only for a few seconds in the microwave. This is a quick and convenient method, but be sure not to heat for too long as the microwave can make them become harder or crispy.

Serving suggestions
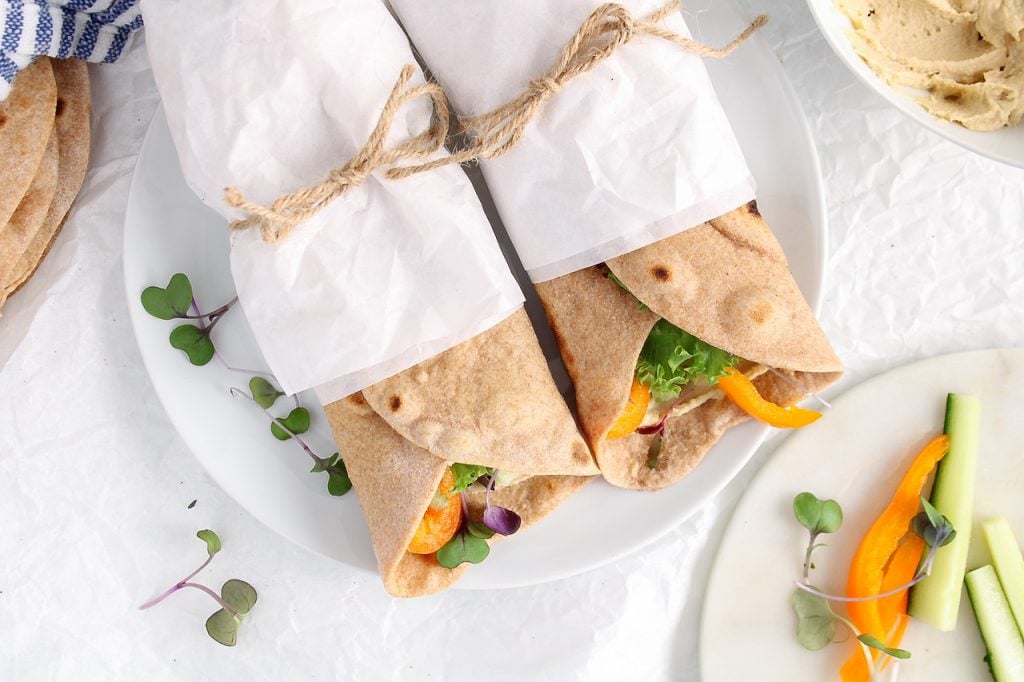
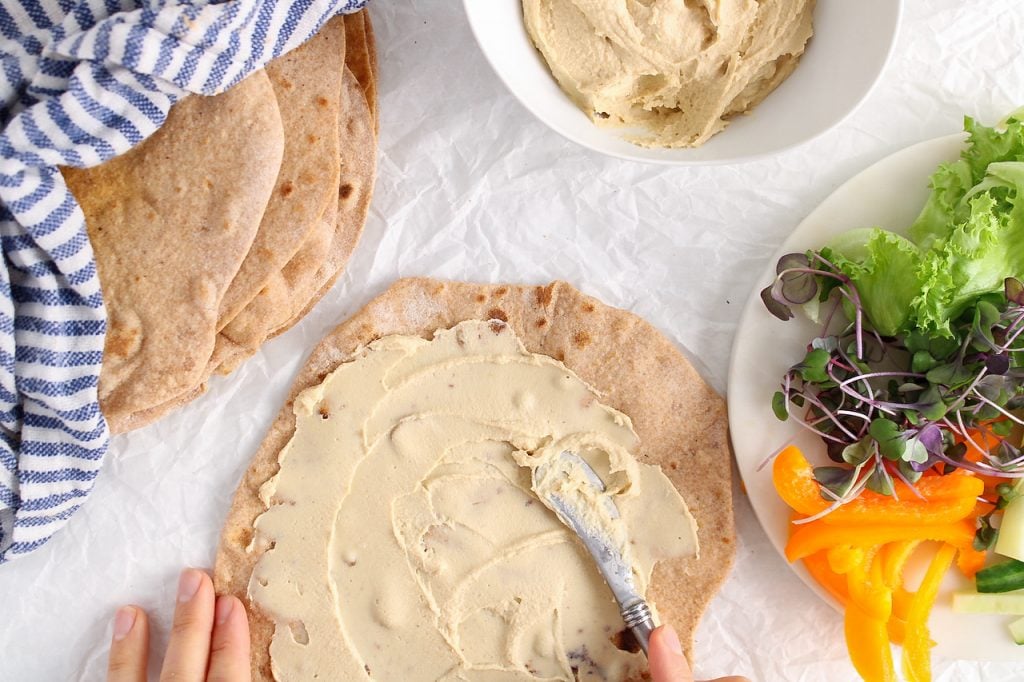
I love to simply use them to make hummus veggie rolls as showed in the picture above. I love to use my broccoli hummus for these. More simple lunch tortilla filling ideas include tofu spread, vegan eggless salad or silken tofu scramble. These whole wheat vegan tortillas will make your meal so much more filling!
Use them as well when making vegan fish tacos for the ultimate homemade taco meal!
For a sweet version, spread pumpkin seed butter all over the tortilla, sprinkle with coconut sugar and cinnamon, then place a whole banana at the bottom. Then, roll to envelop the banana completely. My kids go crazy for that snack! I serve them as breakfast or even, slice them like sushi (maki looking shape) to fill their lunch box as they are nut-free.
Other ideas include burritos, enchiladas, fajitas, jackfruit chili or use them as a base to make pizza!
Other bread recipes you might like
- Buckwheat chia bread
- Vegan apple cinnamon bread
- Oat milk bread
- Vegan dinner rolls
- Buckwheat wraps
- Vegan everything bagels
- Red lentil tortilla wraps
I hope you enjoy this homemade tortilla recipe as much as we do! If you try them, please leave a comment below and rate the recipe to let me know how they were. Your feedback is so helpful!
Let's stay in touch with Instagram, Pinterest and Facebook. Also, don't forget to subscribe to my newsletter to be sure not to miss anything.
📖 Recipe

Vegan Soft Tortillas with Whole Wheat Flour
Ingredients
- 2 ½ cups whole wheat flour
- 1 tsp baking powder
- ½ tsp salt
- ¼ cup coconut oil - refined and melted
- 1 cup hot water - no boiling
Instructions
- Combine the flour, baking powder and salt in a large bowl and combine. Then, add the warm water and melted coconut oil and keep stirring until the dough comes together (it should form a large ball).
- On a clean surface, sprinkle a little flour and transfer the dough on it. Then, knead the dough for 5 minutes. You can sprinkle the dough with a little flour once in a while if it becomes too sticky, but don't add too much so it does not get too dry.
- Once you are done kneading the dough, then separate the dough in between 8 equal portions. Shape the individual portions in a small balls by rolling in between your hands. Then, cover the balls with a humid towel (important or they will dry) and let them rest for 30 minutes.
- When ready to cook the tortillas, warm up a large cast iron skillet (don't grease it) on medium heat. Then, using a rolling pin, roll one of the discs as thin as you can into the shape of a large disc (about 8 inches wide). Once the pan is warmed up, transfer to the pan (keep the other disc under the humid towel while doing this). Cook for about a minute and when it start to create bubbles with light brown spots (you can flip one of the sides to check on color), then flip it and cook for about another minute.
- Once cooked, transfer them right away on a plate and cover with a humid towel again. This will act as a steamer and helps the tortilla get super nice and soft. Simply pile all the tortillas on top of each other as you go and keep them all cover with the humid towel. Let them steam for at least 30 minutes before eating.
Video

Notes
- You might have to play around with the heat when first starting to cook your tortillas: you want many bubbles to form all over the tortillas after about one minute, then flip. If the bubbles form too quickly, then turn down your heat or it can burn. If the bubbles are barely forming even after one minute of cooking, then up your heat a bit (cooking for too long can dry them up). You also want to avoid burnt spots.
- Storing your tortillas: keep them in an air-tight container in the fridge for up to 5 days. It is important that no air comes in contact with the tortillas while storing or they might dry.
- Freezing tips: you can freeze them for up to 6 months. Keep them in an air-tight container and separate them with a layer of parchment paper so you can grab only a few at time.
- How to reheat: Reheat in a pan only for a few seconds on each sides. If you want to reheat many tortillas at the same time, then wrap them in foil and warm up in the oven (350º) for about 10-15 minutes. Although not ideal, when in a rush, it is ok to use the microwave. In that case, be sure to first wrap them with moist paper towels and warm up only a few seconds or they can harden.
- Nutrition: please note that the nutritional information is an estimate per serving provided for informational purposes only (calculated by software) and accuracy is not guaranteed. Consult with your healthcare provider or a registered dietitian if you need precise nutrition calculations for health reasons.
NUTRITION
Pin it for later!

Can extra virgin olive oil be used instead of coconut oil?
Hi Tee, good question! I haven't tried using a different kind of oil, so I cannot say for sure, but I think it might work with olive oil as well. The flavor will be stronger and the texture might be slightly different, though. Let me know if you tried it! 😊
I would love to make these at home , but I am on a no oil of any kind restriction. Any suggestions on how I could still make these happen? Thanks a bunch from Canada 🇨🇦 Leslie
Hi Leslie! I am not sure you can omit the oil as I am worried it would make them too stiff. I have a red lentil tortilla recipe that would work better for your diet, although you would likely need some oil so the tortilla don't stick to your pan when cooking them (this red lentil wrap recipe is pretty sticky). 😊
These are AMAZING!! This recipe and your video and directions were awesome… and they came out SO good! This will be my go-to recipe!
I made 10 so they would be a bit smaller and used Avocado oil, and just couldn’t stop eating them! Thank you so much! I had no clue they would be so easy to make.
Oh this is great Theresa! I'm so glad you loved them! Thanks for sharing 🙂
Thank you for this. It’s and concise and looks easy to do!
I will try.
I am in the UK, are the cup measurements US or UK size cup?
Thank you.
Hi Vera! Hope you like them :), the measurement are in US size cups.
Does this recipe work with olive/avocado/canola oil?
Hi! I haven't tried it, so I am not sure, but I think it probably would work. 😊